SNMP Configurations
SNMP v3 Configuration for FortiGate Monitoring
Step-by-step guide to configure SNMP v3 on FortiGate and integrate it with Netwatch for secure monitoring.
Overview
SNMP v3 provides enhanced security through authentication and encryption compared to SNMP v1 and v2c. In this guide, you will learn how to configure SNMP v3 on a FortiGate device and link it to Netwatch for monitoring.
Part 1: Create an SNMP v3 User in the FortiGate GUI
1. Access the SNMP Settings
- Log in to your FortiGate web GUI.
- Navigate to System > SNMP.
- Under SNMP v3, click Create New.
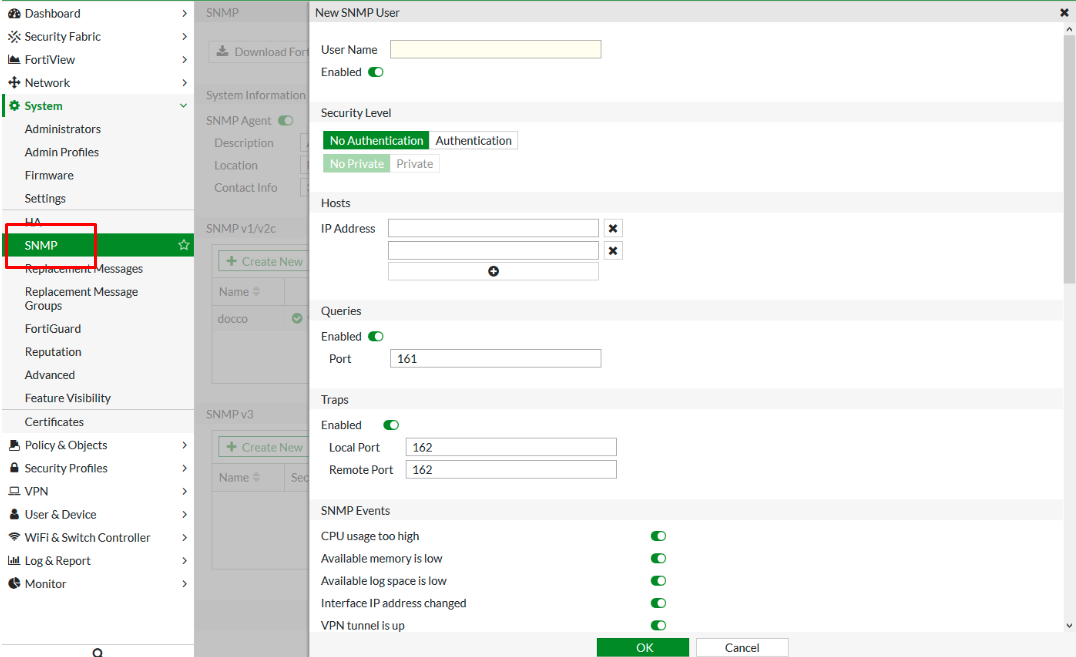
2. Create SNMP v3 User
For example, fill as follows:
| Field | Example Value |
|---|---|
| Username | netwatch |
| Security Level | Authentication and Private |
| Auth Protocol | SHA |
| Auth Password | AuthPass123! |
| Privacy Protocol | AES |
| Privacy Password | PrivPass456! |
- Remember, use your own secure credentials.
- Check Enable this SNMP User.
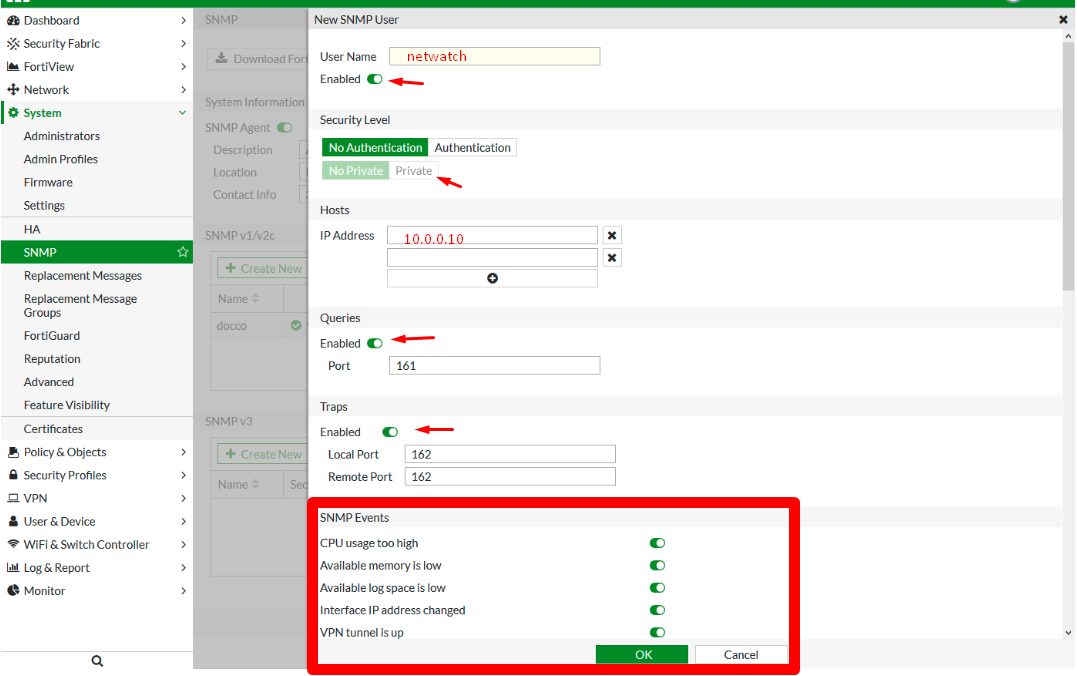
3. Configure Hosts and Traps
Example values:
| Field | Example Value |
|---|---|
| Notify Hosts | 10.0.0.10 |
| Query Port | 161 (default) |
| Trap Port | 162 (default) |
| Source IP | 192.168.1.1 (FortiGate) |
- In the Hosts section, specify the IP of the Netwatch server.
- In Queries and Traps, enter port numbers and toggle settings as needed.
- Under SNMP Events, enable events like
cpu-high,mem-low,log-full, etc. - Click OK.
Part 2: Create an SNMP v3 User via FortiGate CLI
You can also create the SNMP user from the CLI with this example:
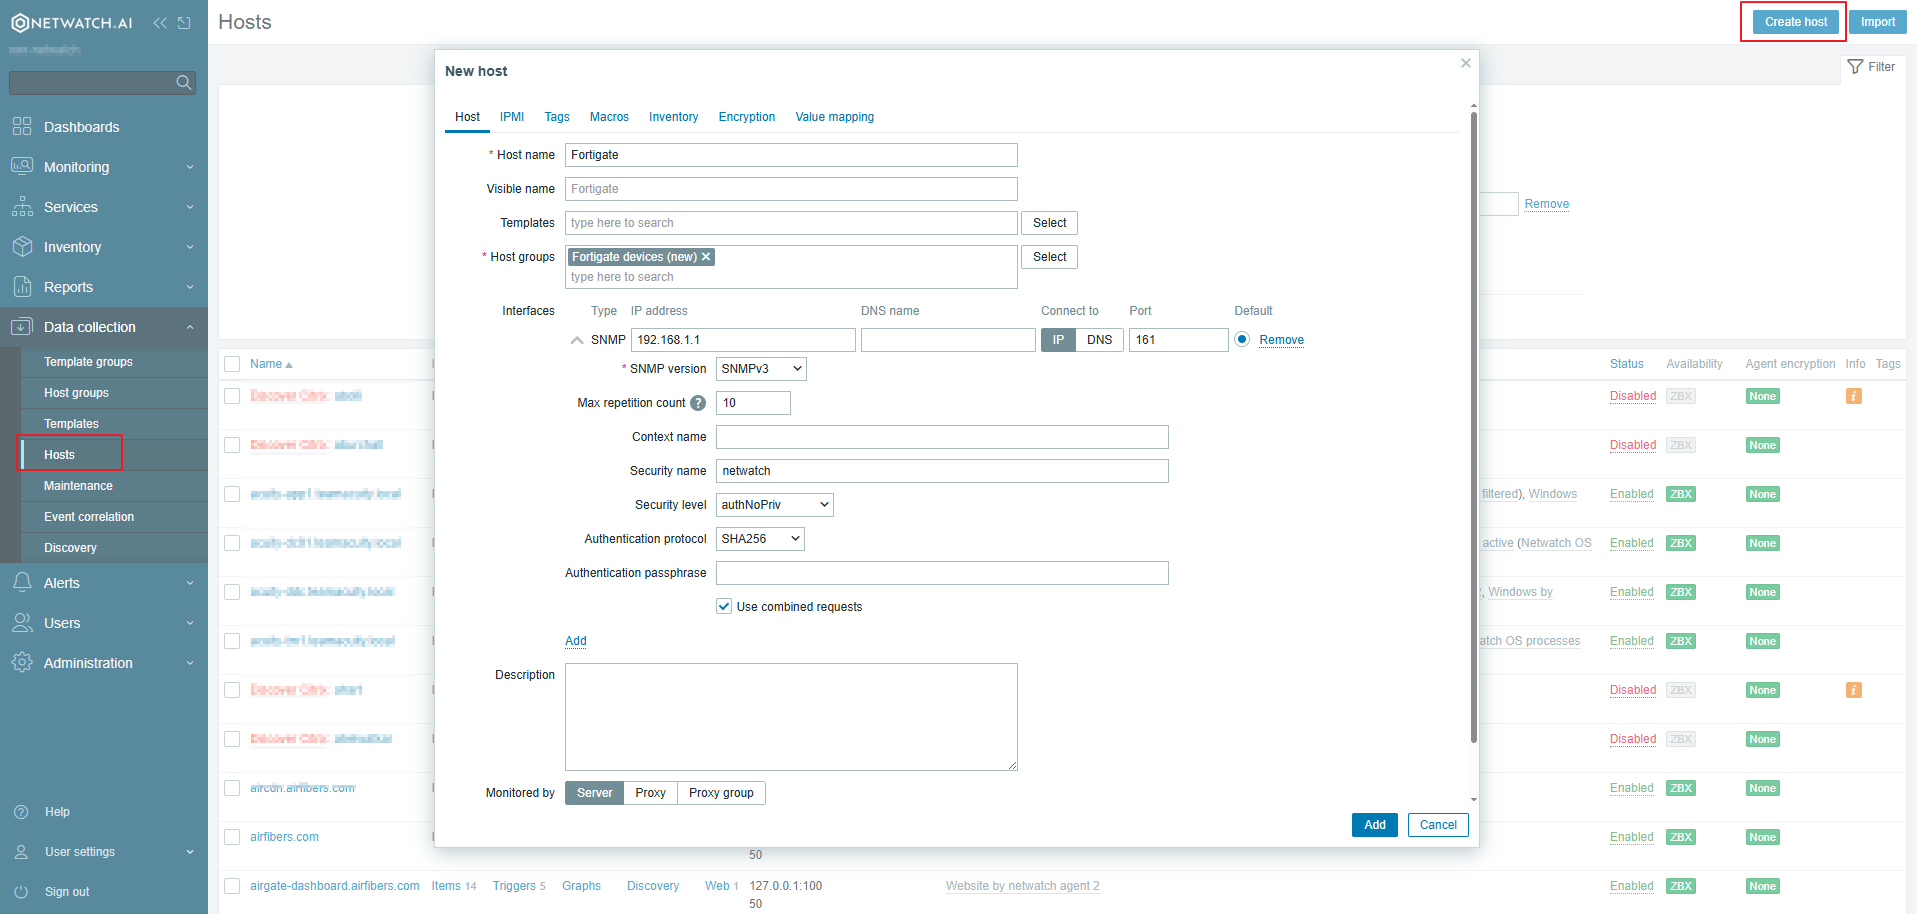
Part 3: Add FortiGate to Netwatch
-
Navigate to Hosts
In Netwatch, go to Monitoring > Hosts.
Click Create Host. -
Host Setup
- Select Interface Type:
SNMP - Fill in the FortiGate IP address (e.g.,
192.168.1.1) - In Security Name, enter the username you created in FortiGate's SNMP v3 config (e.g.,
netwatch) - Choose:
- SNMP Version:
v3 - Authentication Protocol:
SHA - Authentication Password:
AuthPass123! - Privacy Protocol:
AES - Privacy Password:
PrivPass456!
- SNMP Version:
- Set Port:
161 - Assign a Host Group (e.g.,
FortiGate Devices)