API Configurations
Google Workspace API Credential for Netwatch Monitoring
Step-by-step guide on generating and configuring Google Workspace API credentials for Netwatch monitoring.
Required Roles
To perform the following steps, you must have one of the following roles:
- Google Workspace Super Admin
- Cloud Project Owner
- Developer with access to the Google Cloud Console
Steps to Generate API Credentials
1. Access the Google Cloud Console
- Navigate to https://console.cloud.google.com.
- Sign in using a Google account with the necessary permissions.
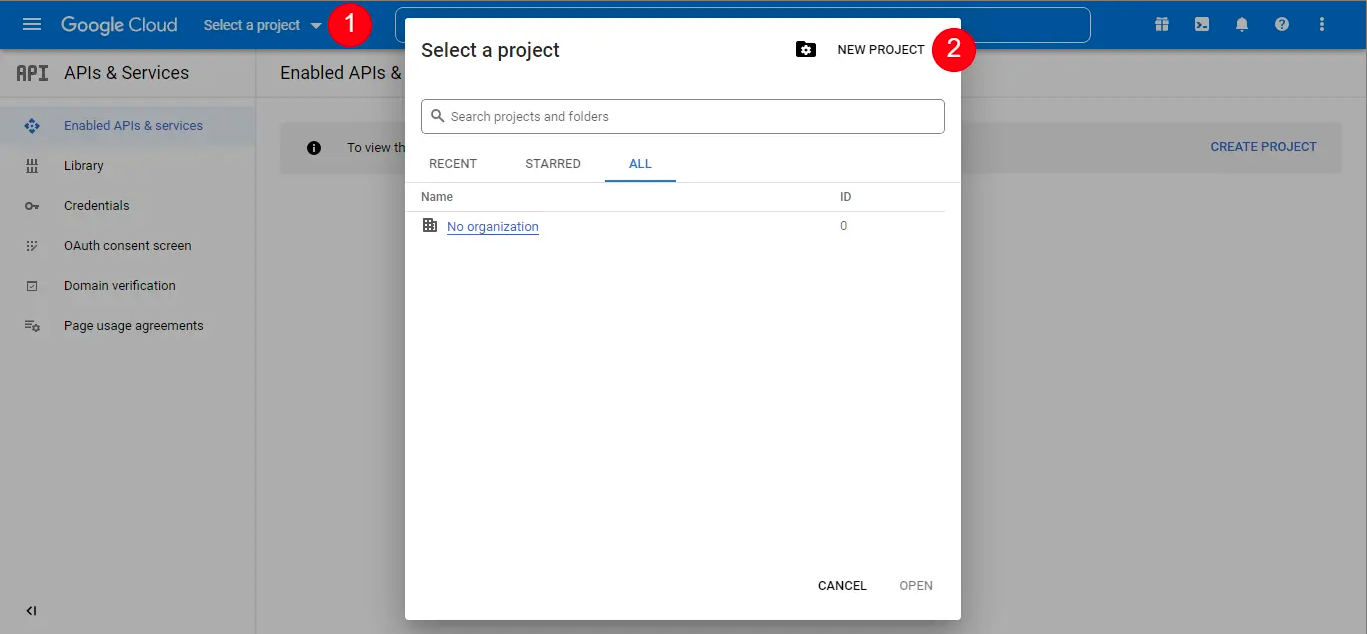
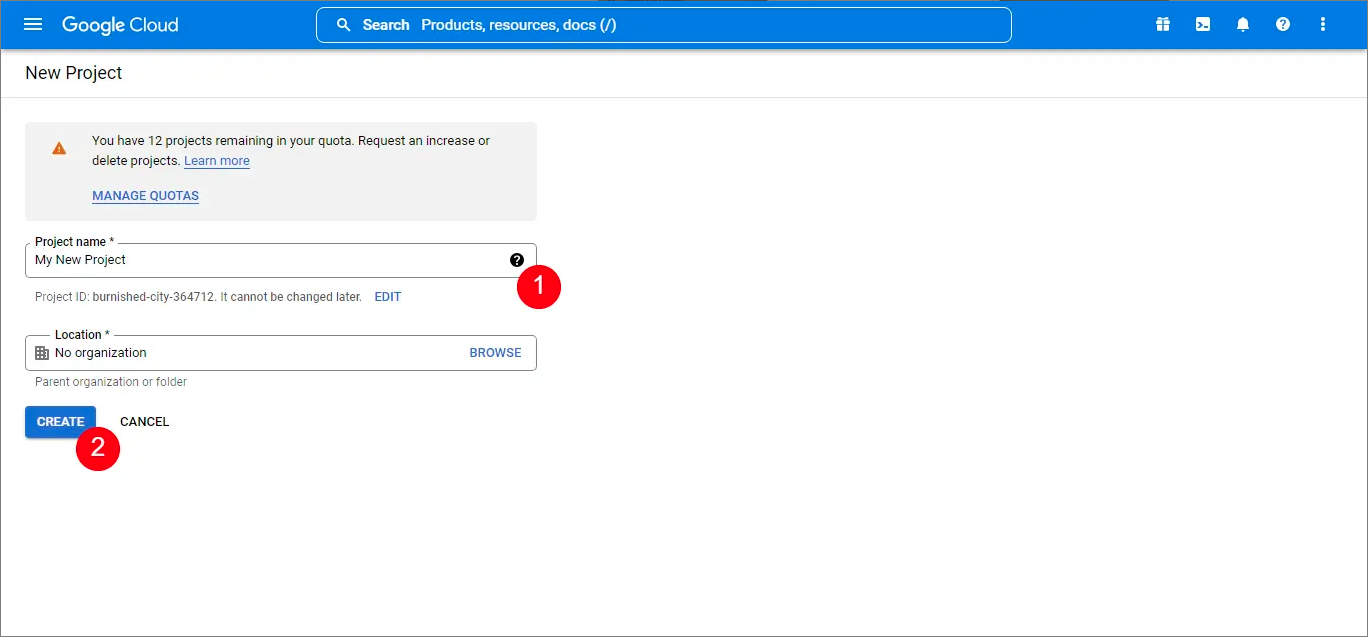
2. Create a New Project
- In the top navigation bar, click Select a project.
- Click New Project, name it Netwatch, and click Create.
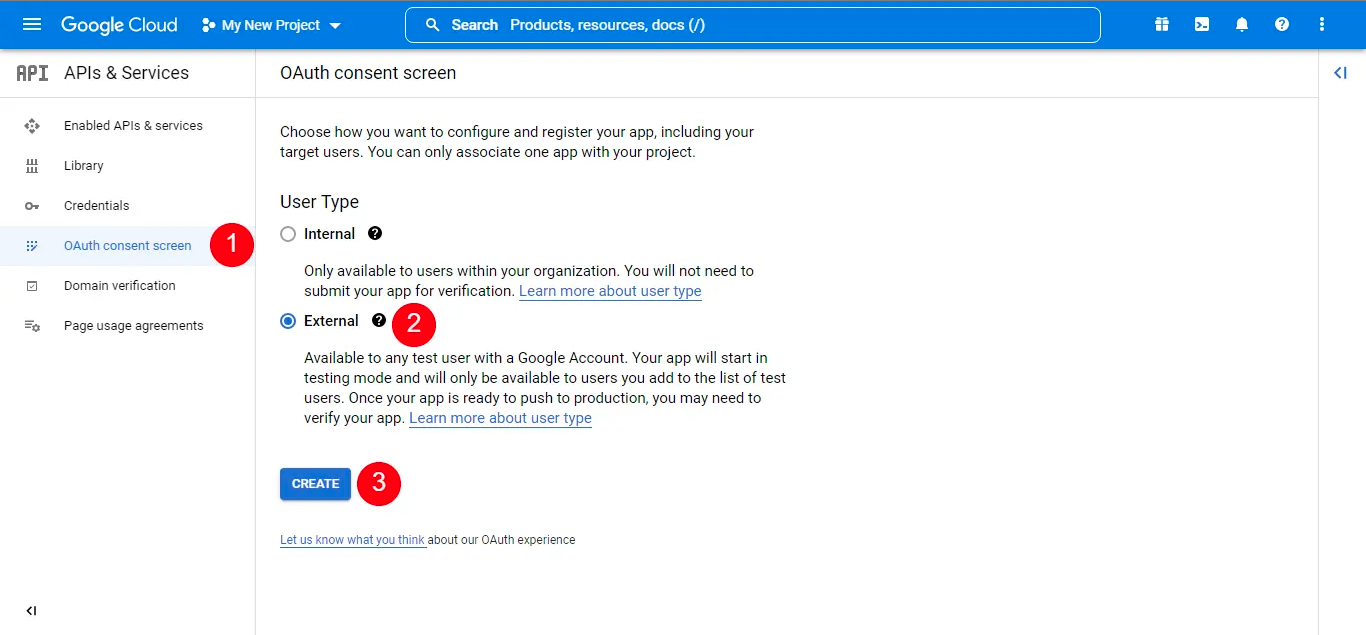
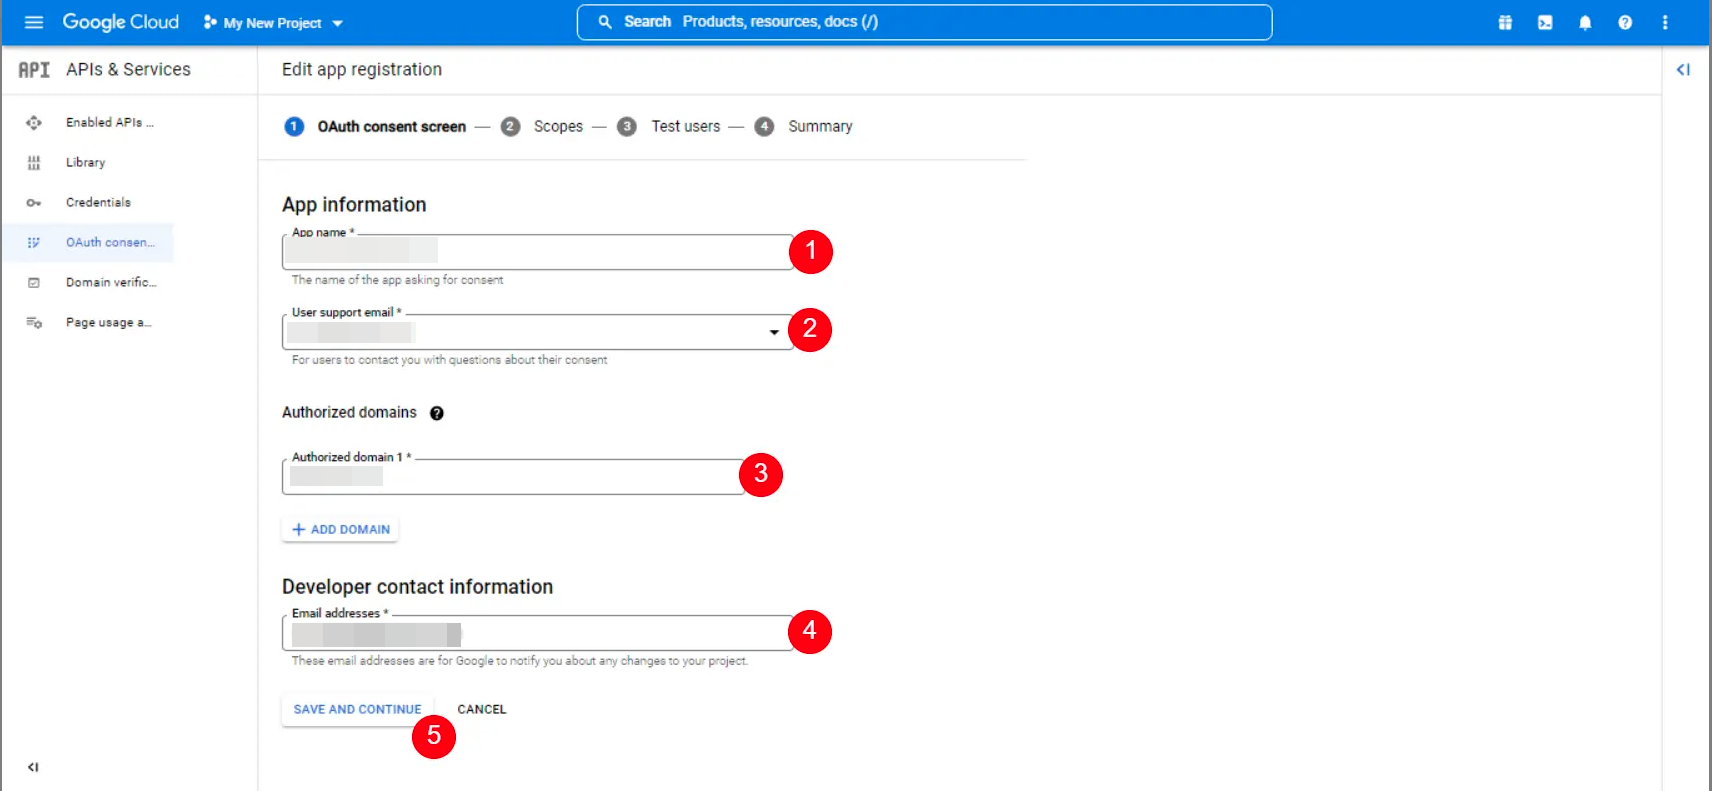
3. Configure OAuth Consent Screen
- From the left navigation pane, select APIs & Services > OAuth consent screen.
- Choose User Type (select Internal for organizational use).
- Click Create.
4. Set Consent Screen Details
- Enter the following:
- App Name: Netwatch
- User Support Email: Your admin or support email
- Authorized Domain: yourdomain.com
- Developer Contact Information: [email protected]
- Click Save and Continue.
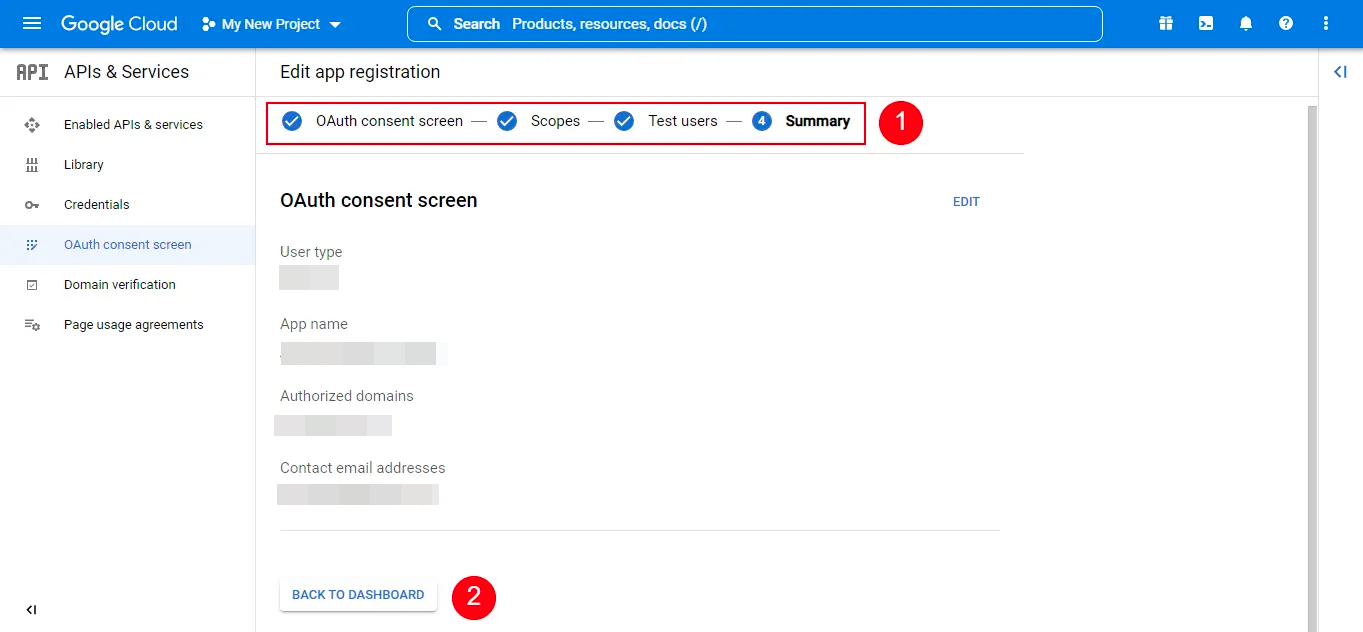
5. Complete Remaining Steps
- Follow through the remaining consent setup screens and click Back to Dashboard once complete.
6. Enable Required APIs
- Go to APIs & Services > Library.
- Enable APIs like:
- Admin SDK API
- Gmail API
- Google Drive API
- Reports API
- These allow Netwatch to monitor Google Workspace performance and usage.
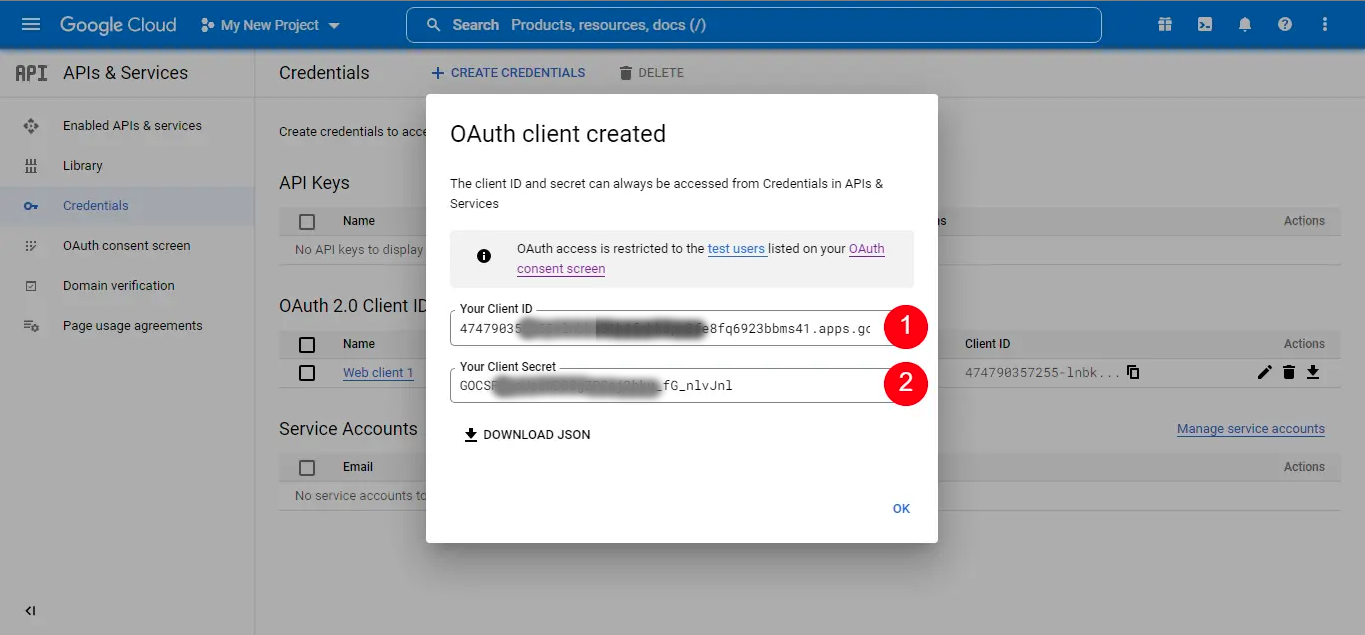
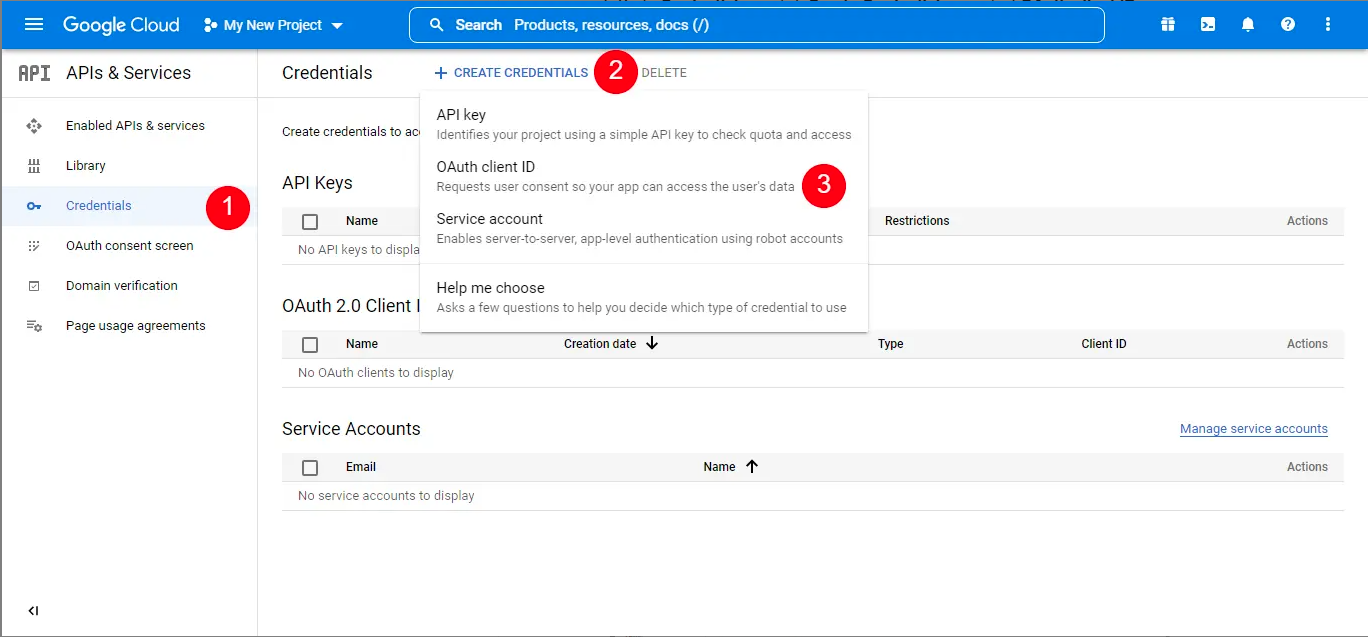
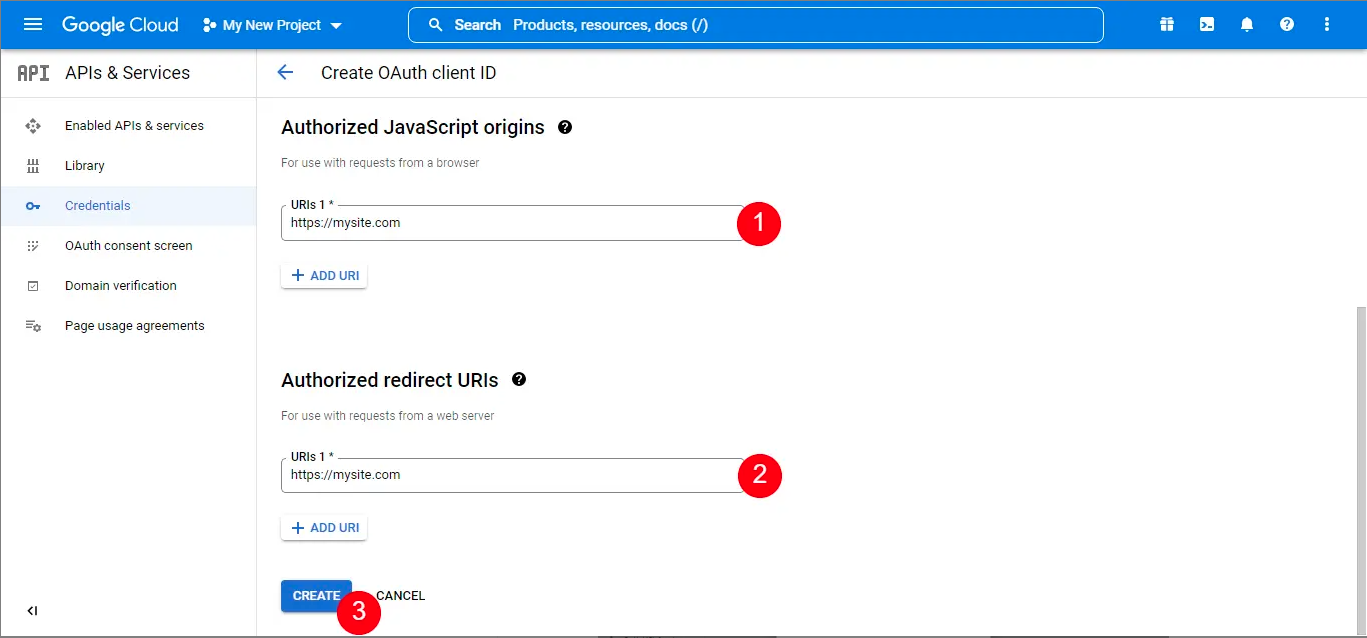
7. Create OAuth Client ID
- Go to APIs & Services > Credentials.
- Click Create Credentials > OAuth Client ID.
8. Select Application Type
- Under Application Type, choose Web Application.
- Name it Netwatch or Web clien 1.
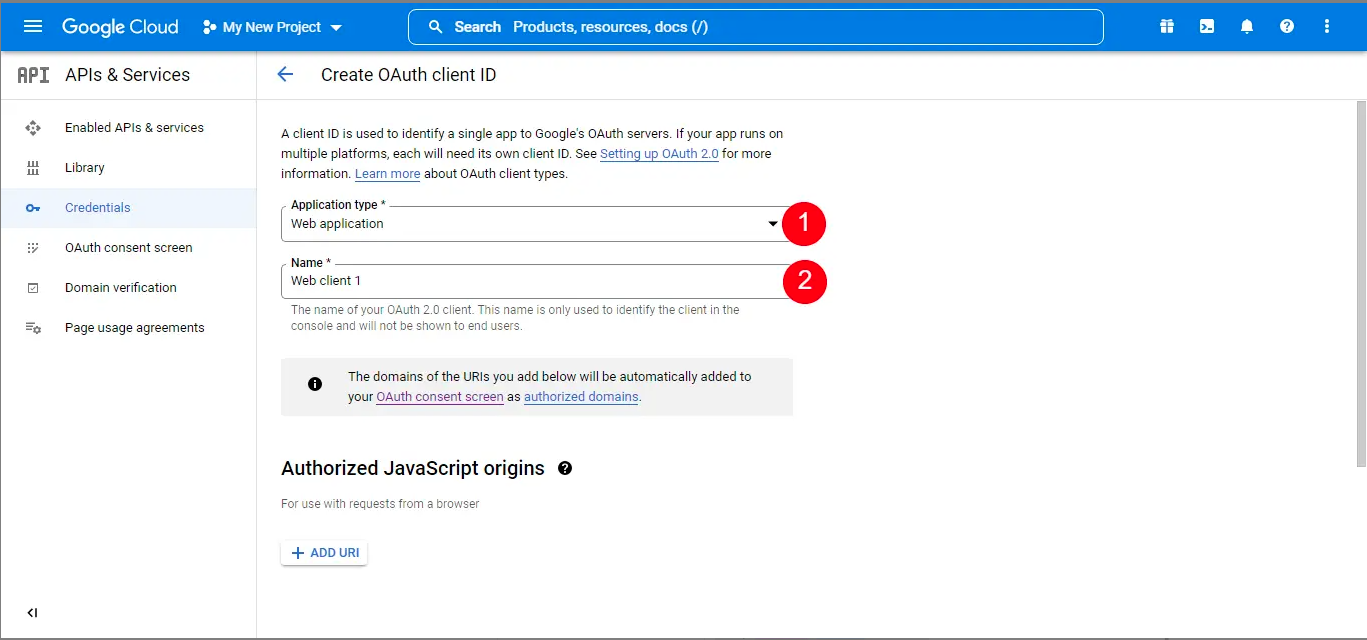
9. Add Authorized URIs
- Under Authorized JavaScript Origins, add your Netwatch domain or instance URL as shown below (https://mysite.com).
9. Copy your Client ID and Client Secret.