
Deploy WatchNode on Nutanix AHV
Deploy the Netwatch WatchNode collector on Nutanix AHV.
Specs: 4 vCPU · 8 GB RAM · 50 GB drive
1 · Import the disk
-
Download the VMDK from the link in our email to the machine you use to reach Prism.
This disk was exported from VMware — no extracting or converting needed.
-
In Prism, open Settings (gear) → Image Configuration → Upload Image.

-
Set Name, Image Type = DISK, choose the Storage Container you want, then Upload a File → the
.vmdk→ Save.The storage container is your choice — pick any active container.
Note — Match the image Name to the VMDK you actually received — e.g.
netwatch-watchnode1.vmdk→ name the imagenetwatch-watchnode1-disk.
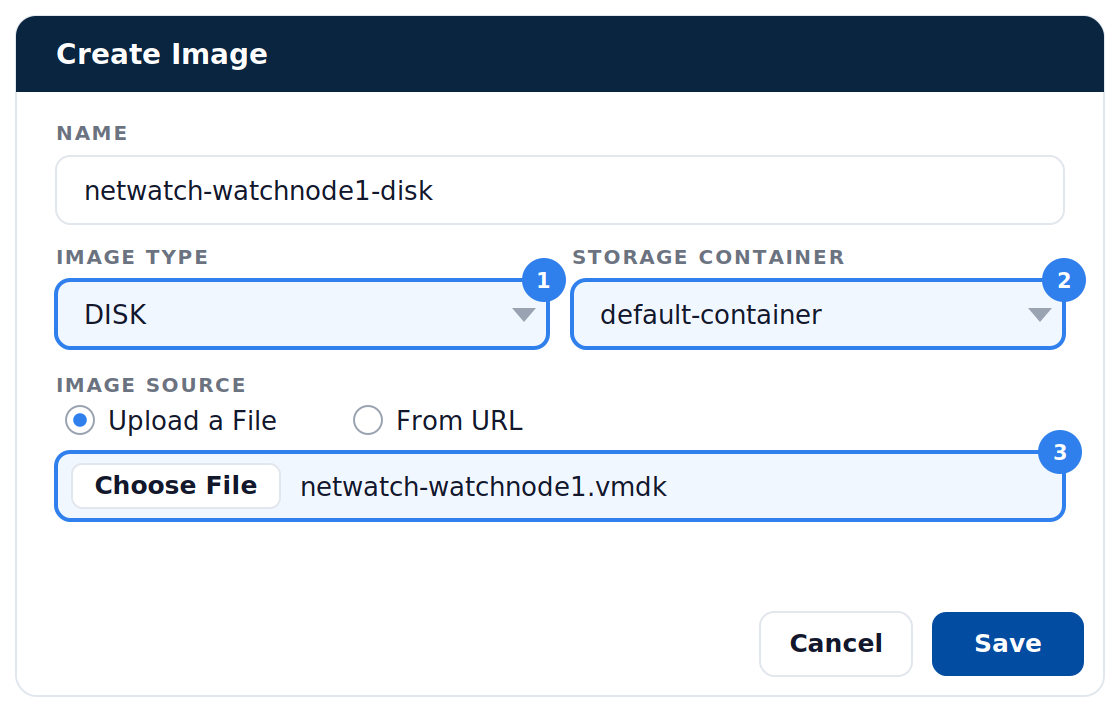
- Wait for State = ACTIVE. It shows INACTIVE while converting — reopen the screen to refresh.

2 · Create the VM
4 vCPU · 8 GB · 50 GB
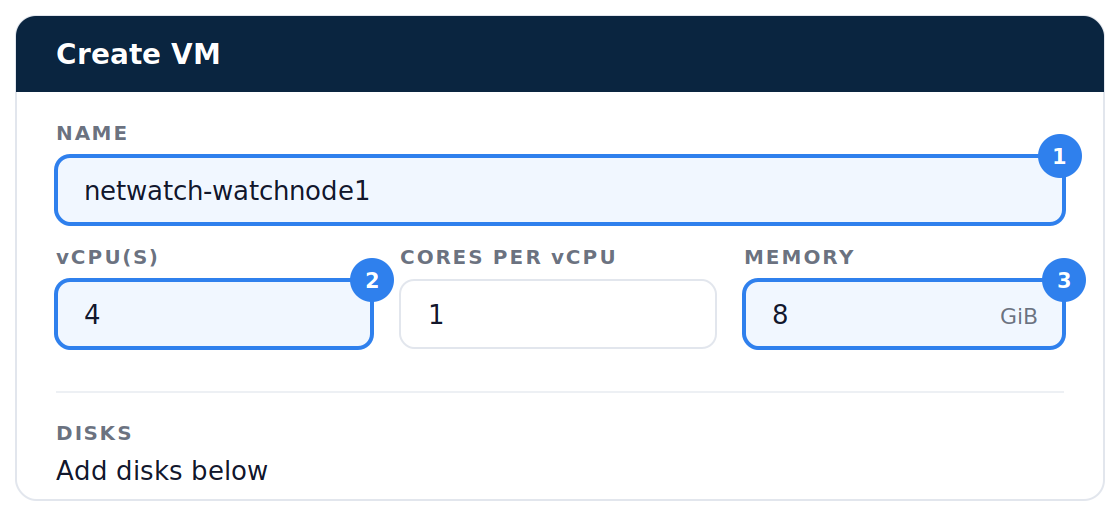
- Open the VM menu → Create VM. Name it
netwatch-watchnode1; set vCPU(s) = 4, Cores per vCPU = 1, Memory = 8 GiB.
-
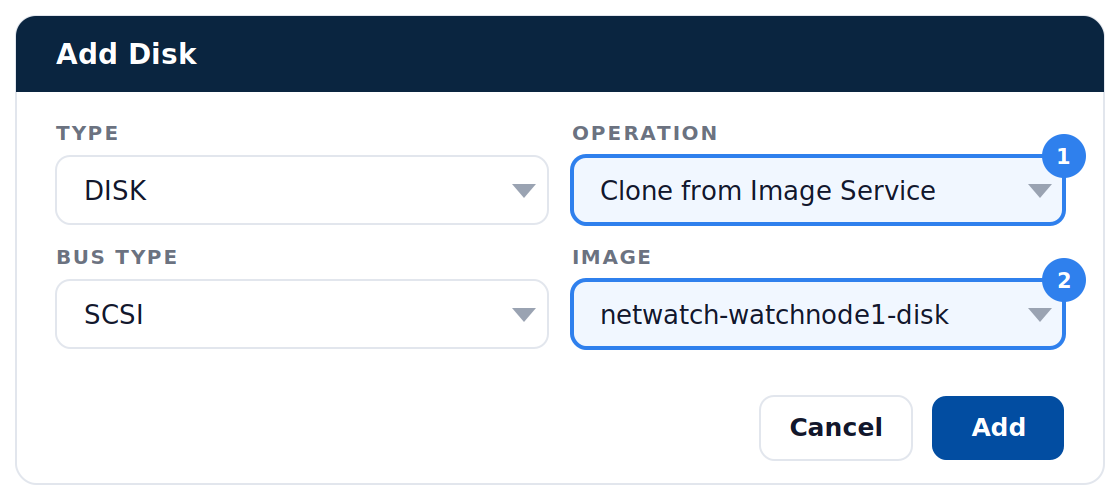
Add New Disk → Clone from Image Service → SCSI → pick
netwatch-watchnode1-disk→ Add.This becomes the boot / OS disk.
-
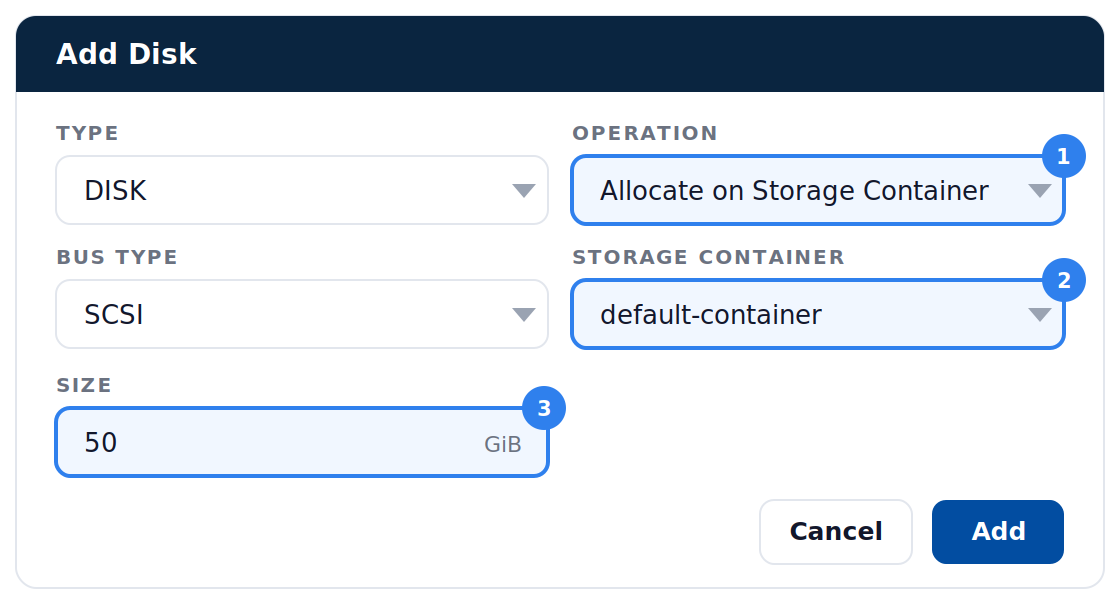
Add New Disk again → Allocate on Storage Container → choose your Storage Container → SCSI → Size = 50 GiB → Add.
The 50 GB data drive for the WatchNode.
-
Add New NIC → select your VLAN → then Save the VM.
-
Select
netwatch-watchnode1→ Power On, then Launch Console to watch it boot.

Prism Element workflow · AHV. Field names may vary slightly by AOS version.