
LDAP Authentication
Configure LDAP authentication against Active Directory for NetOPS.
Prerequisites
An existing service account on the Active Directory (AD) that has permission to do the following:
- Membership in Domain Users
- Read access to users and groups
- Permission to read attributes such as
sAMAccountName,memberOf,CN, first name, last name, and email
Enable LDAP Authentication
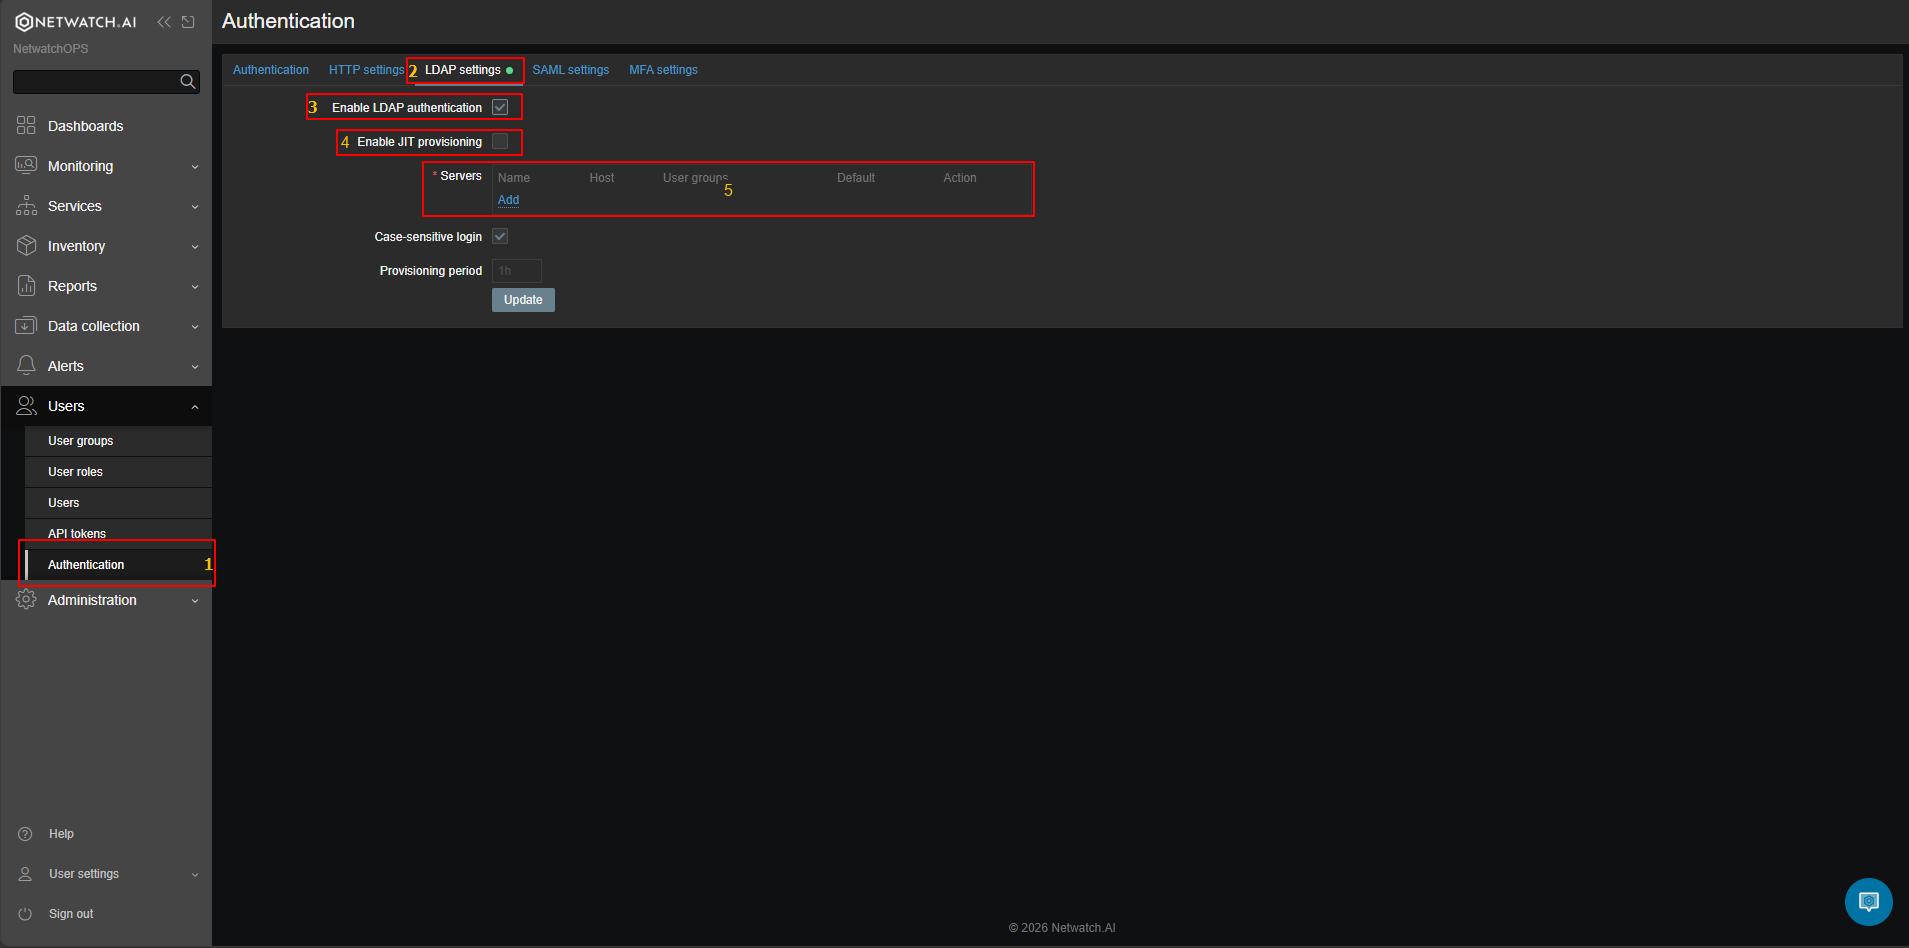
- Go to Users > Authentication > LDAP settings.
- Check Enable LDAP authentication.
- Check Enable JIT provisioning to have user accounts created automatically on first login.
- Under the Servers section, click Add. This brings up the LDAP Server widget shown below.
Configure the LDAP Server
The following fields are required to configure the LDAP connection.
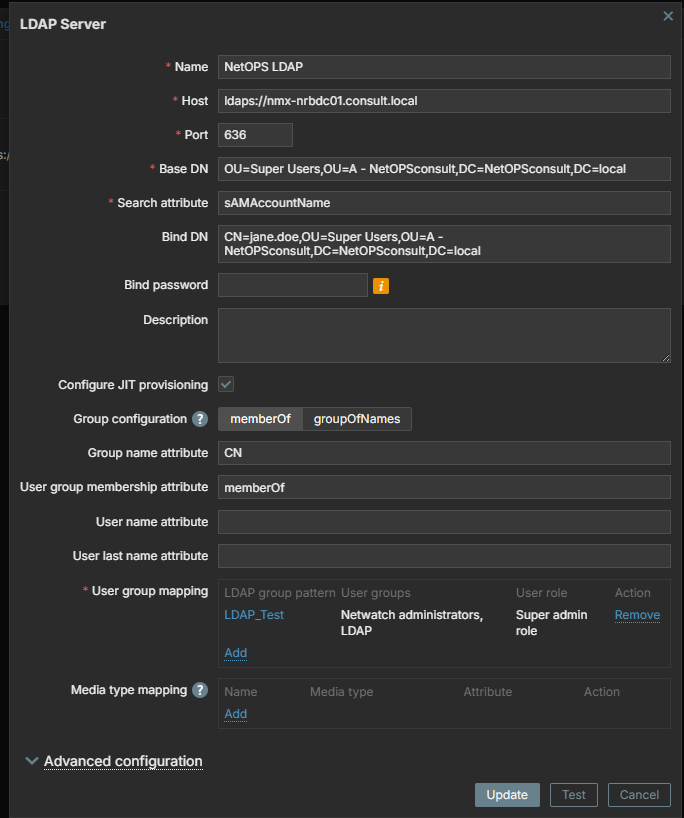
- Name – a label for the LDAP connection, i.e.,
Netwatch LDAP. - Host – the AD server. For example
dc01.company.local. - Port – use port
389. - Base DN – the search base for user lookups, taken from the
DCparts of the distinguished name. For exampleDC=company,DC=local. - Search attribute –
sAMAccountName. - Bind DN – the distinguished name of the service account (see below).
- Bind password – password for the service account.
Getting the DN of the Service Account
From Windows AD, find the OU where the service account resides, then right-click the service account > Properties > Attribute Editor and scroll to distinguishedName.
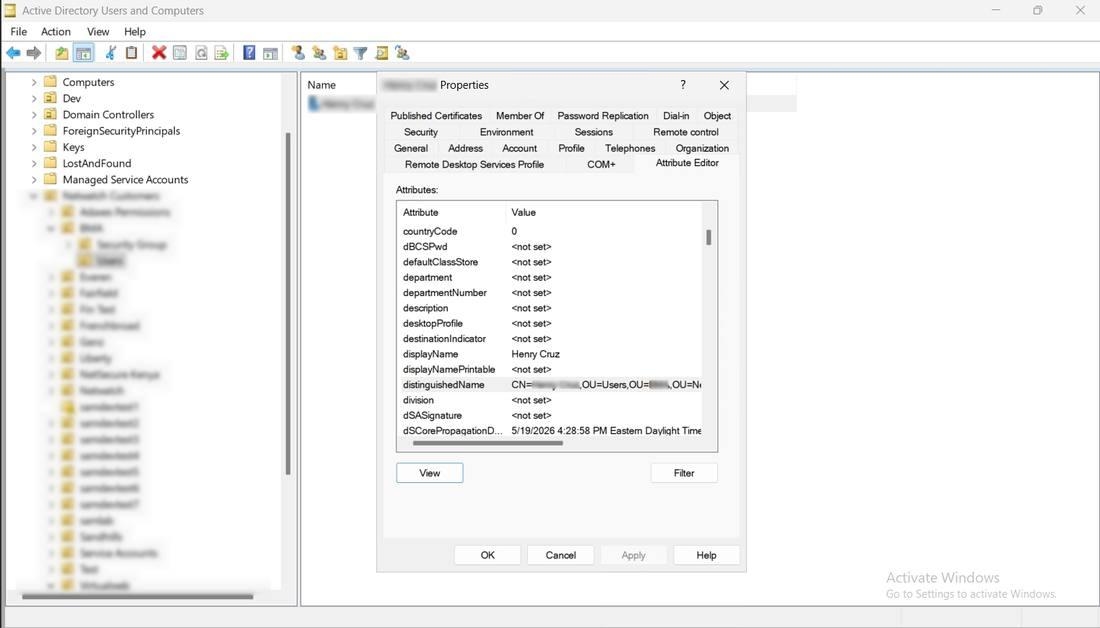
Double-click distinguishedName to open the String Attribute Editor and copy the full value.
User Group Mapping
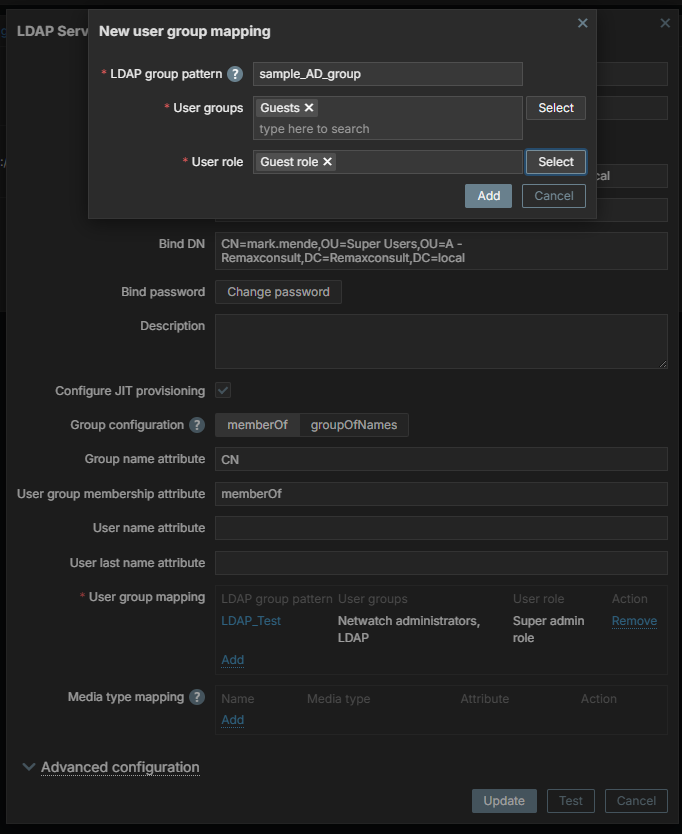
Map your AD groups to Netwatch user groups and roles. Under User group mapping, click Add, enter the LDAP group pattern, then select the user groups and user role that members of that AD group should receive.
See Dashboard-only users for how to create user groups and roles.
Test the Connection
Click Test at the bottom of the widget, then enter the credentials of one of the users in the AD.
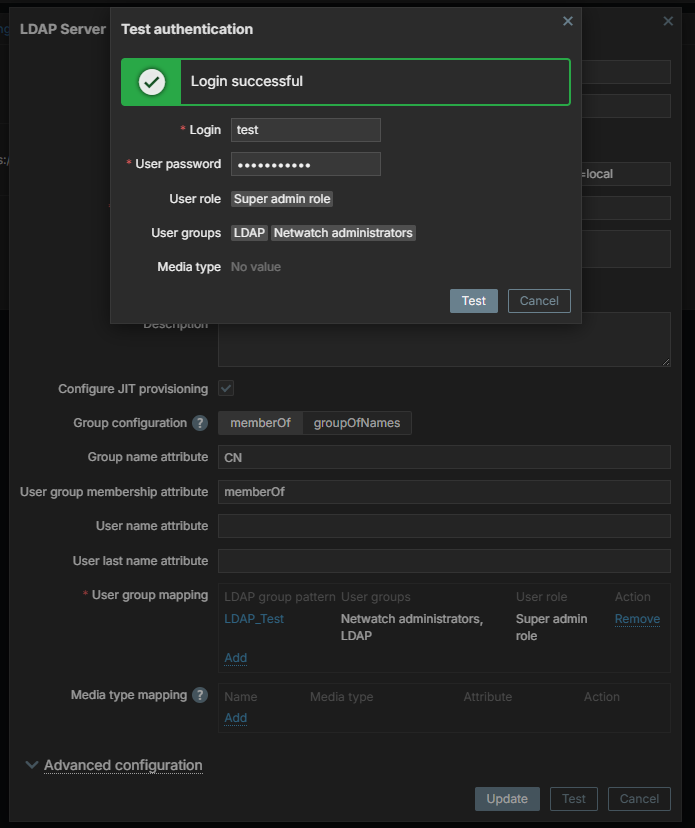
Once the test is successful, click Update to save the configuration.