
Masking SNMPv3 credentials
Mask SNMPv3 credentials using secret text macros.
Overview
By default, SNMPv3 authentication and privacy passphrases entered directly on a host's interface are stored and displayed as plain text in the Netwatch frontend. This guide explains how to use Secret Text Macros to mask these values so they cannot be viewed after saving.
Prerequisites
Before configuring secret macros, ensure the following:
- The target host is already configured or to configure with an SNMPv3
- You know the SNMPv3 authentication and privacy passphrases you wish to mask
Step 1 – Navigate to the Host Configuration
-
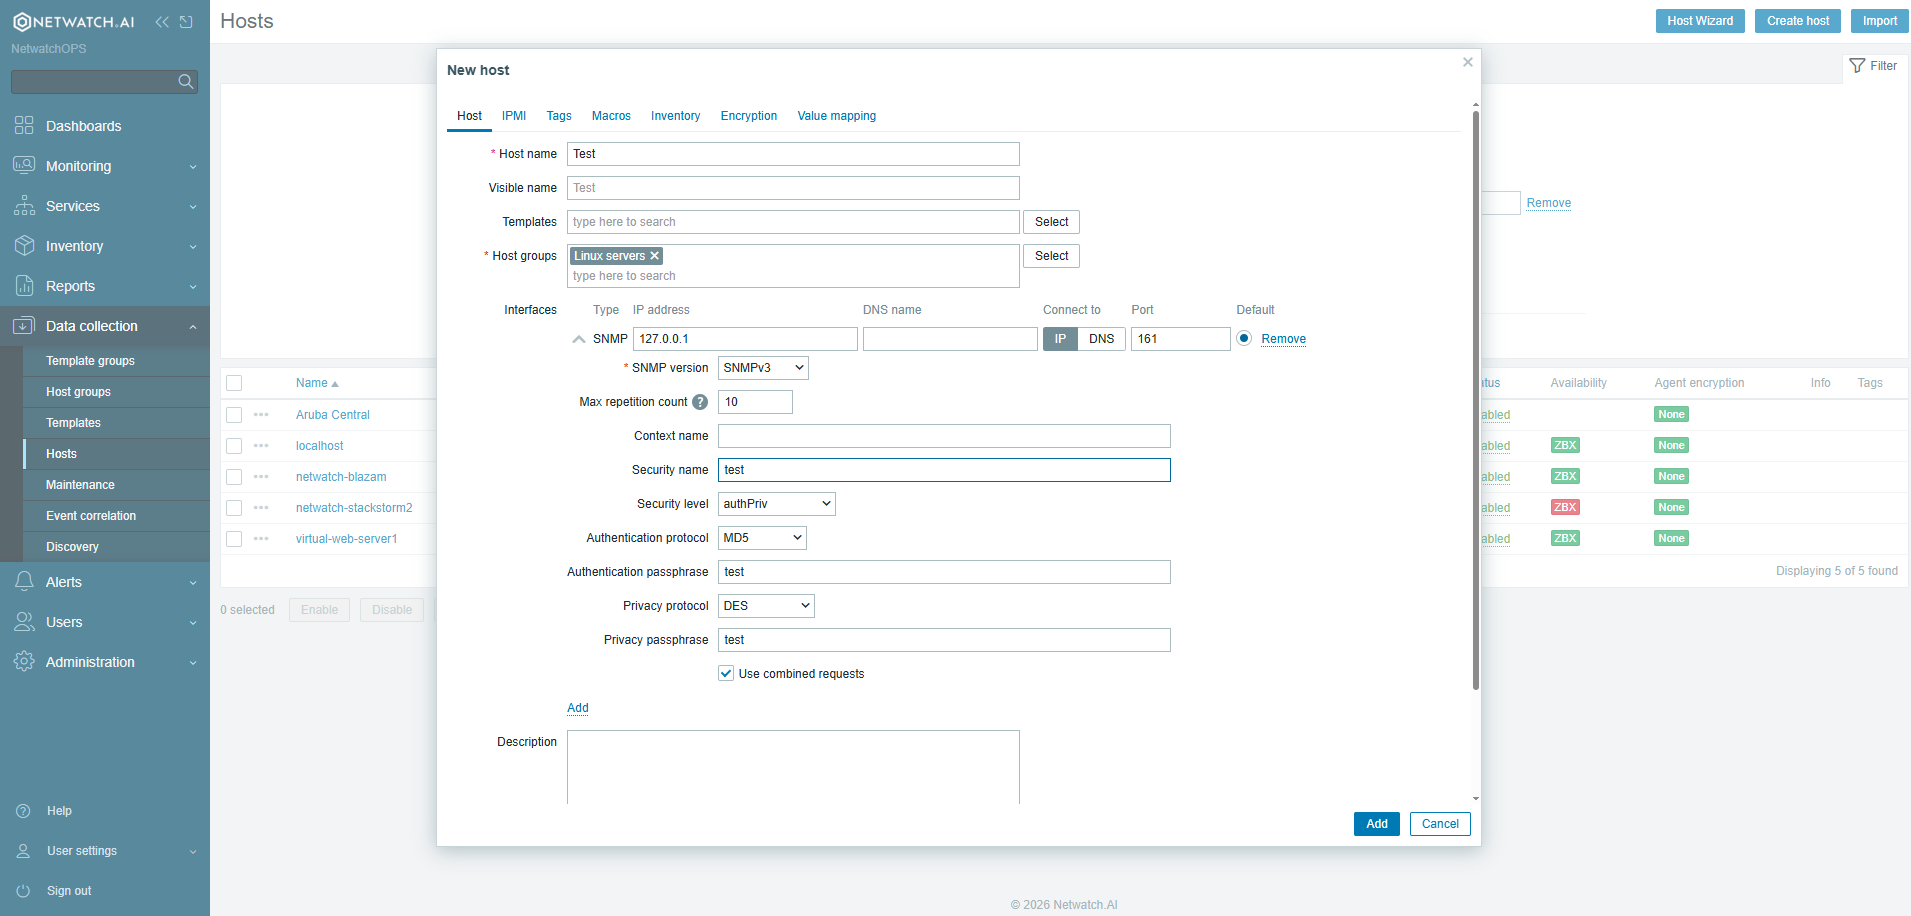
From the left-hand navigation menu, go to:
Data Collection → Hosts
-
Locate/create the host whose SNMPv3 credentials you want to mask.
-
Click on the host name to open its configuration.
Step 2 – Open the Macros Tab
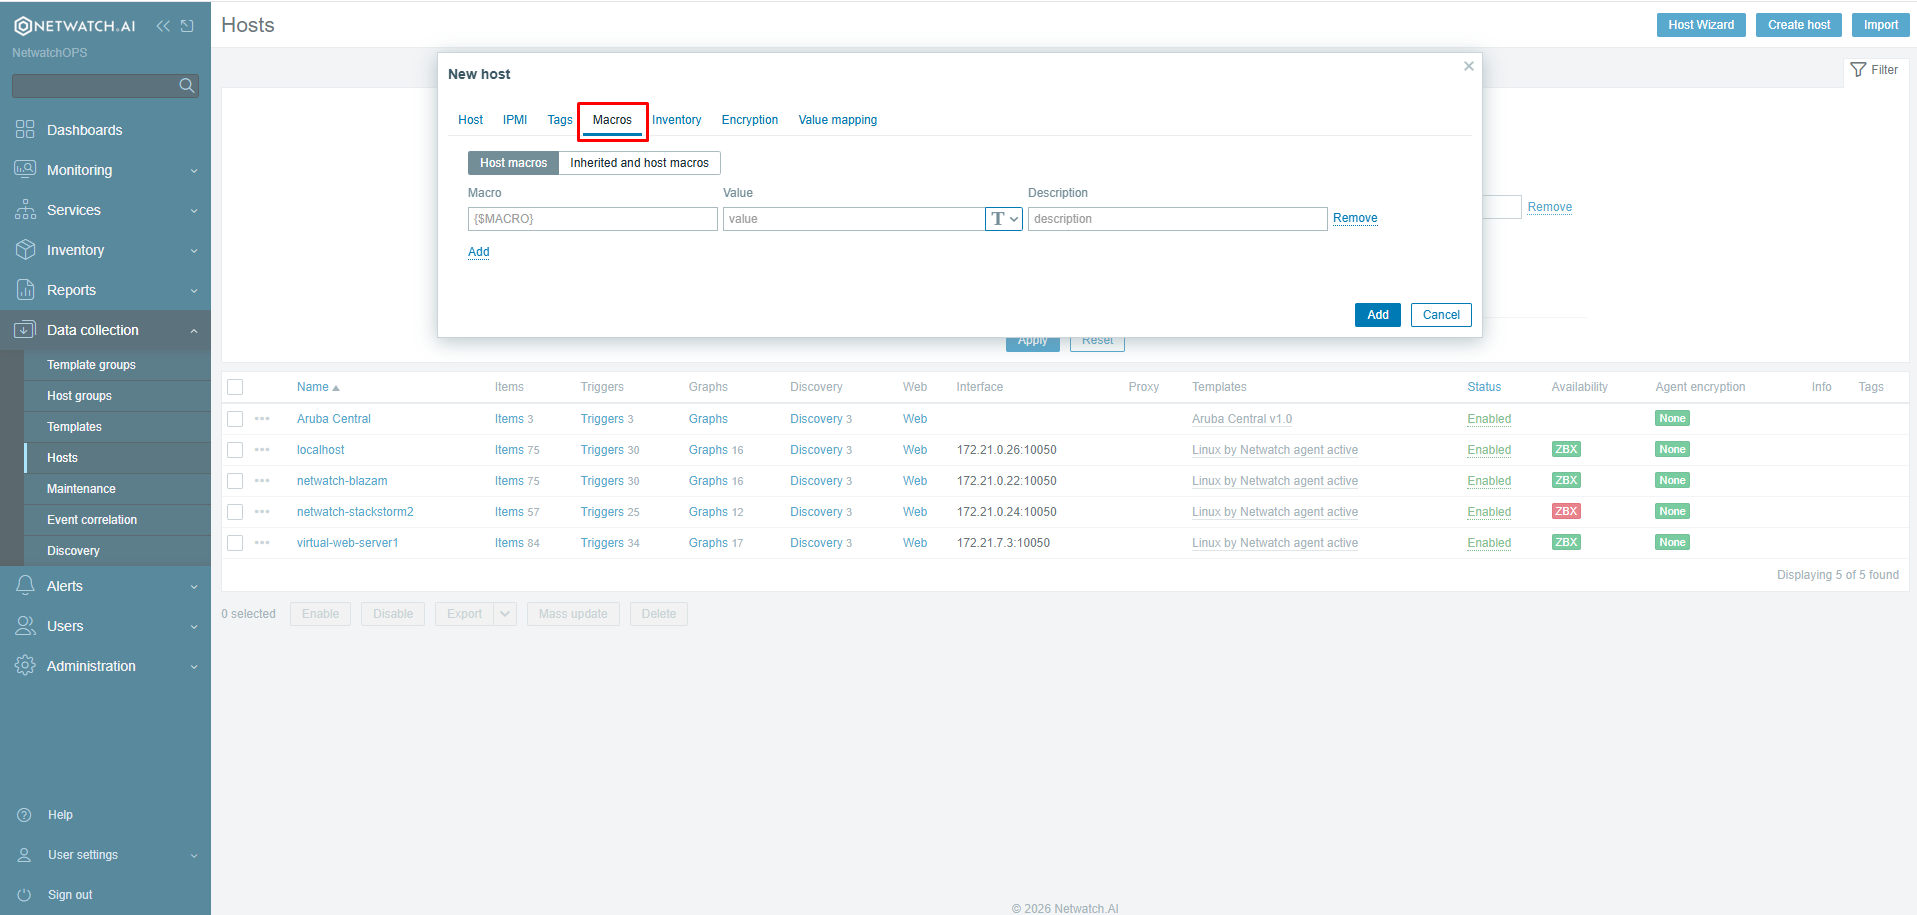
- Inside the host configuration window, click the Macros tab.
- You will see a list of any existing user macros defined for this host.
Step 3 – Add Macros for Your SNMPv3 Credentials
-
Click Add to create a new macro entry.
-
Add the following macros (repeat the Add step for each):
Macro Name Value Purpose {$SNMP_AUTHPASS}Your authentication passphrase Replaces the hardcoded auth passphrase {$SNMP_PRIVPASS}Your privacy passphrase Replaces the hardcoded privacy passphrase {$SNMP_SECNAME}Your SNMPv3 security username Optionally masks the security name too Tip: You may name the macros anything you like, but using consistent naming conventions (e.g.
{$SNMP_AUTHPASS})
Step 4 – Set the Macro Type to "Secret Text"
This is the critical step that enables masking.
-
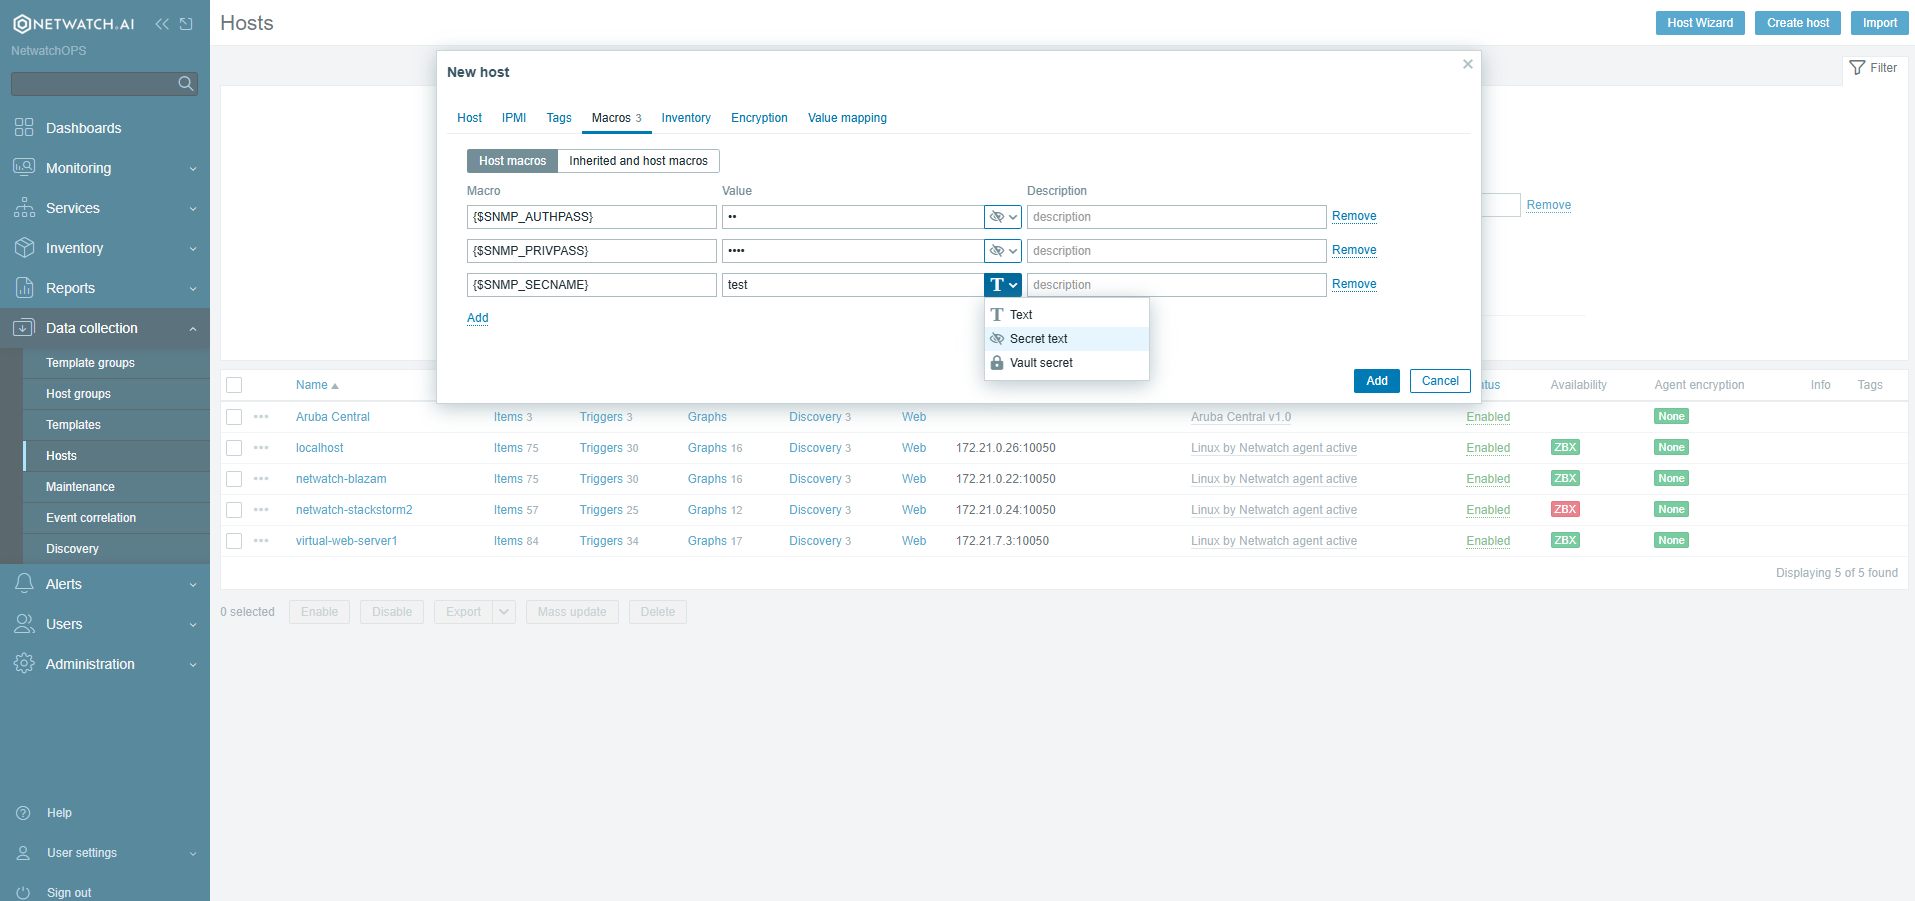
After entering the macro name and value, locate the type dropdown at the right end of the Value field.
-
Click the dropdown and select Secret text.
The value field will immediately change to display asterisks (
******) in place of the passphrase. -
Repeat for each credential macro you added.
Important: Once you save the configuration, it will no longer be possible to view the original value. To update a masked value, hover over the Value field and click the Set new value button that appears. This will erase the current value before allowing you to enter a new one.
Step 5 – Save the Macro Configuration
- Click Update (or Add if this is a new host) to save the host configuration.
- The macros are now saved with masking applied.
Step 6 – Reference the Macros in the SNMPv3 Interface Fields
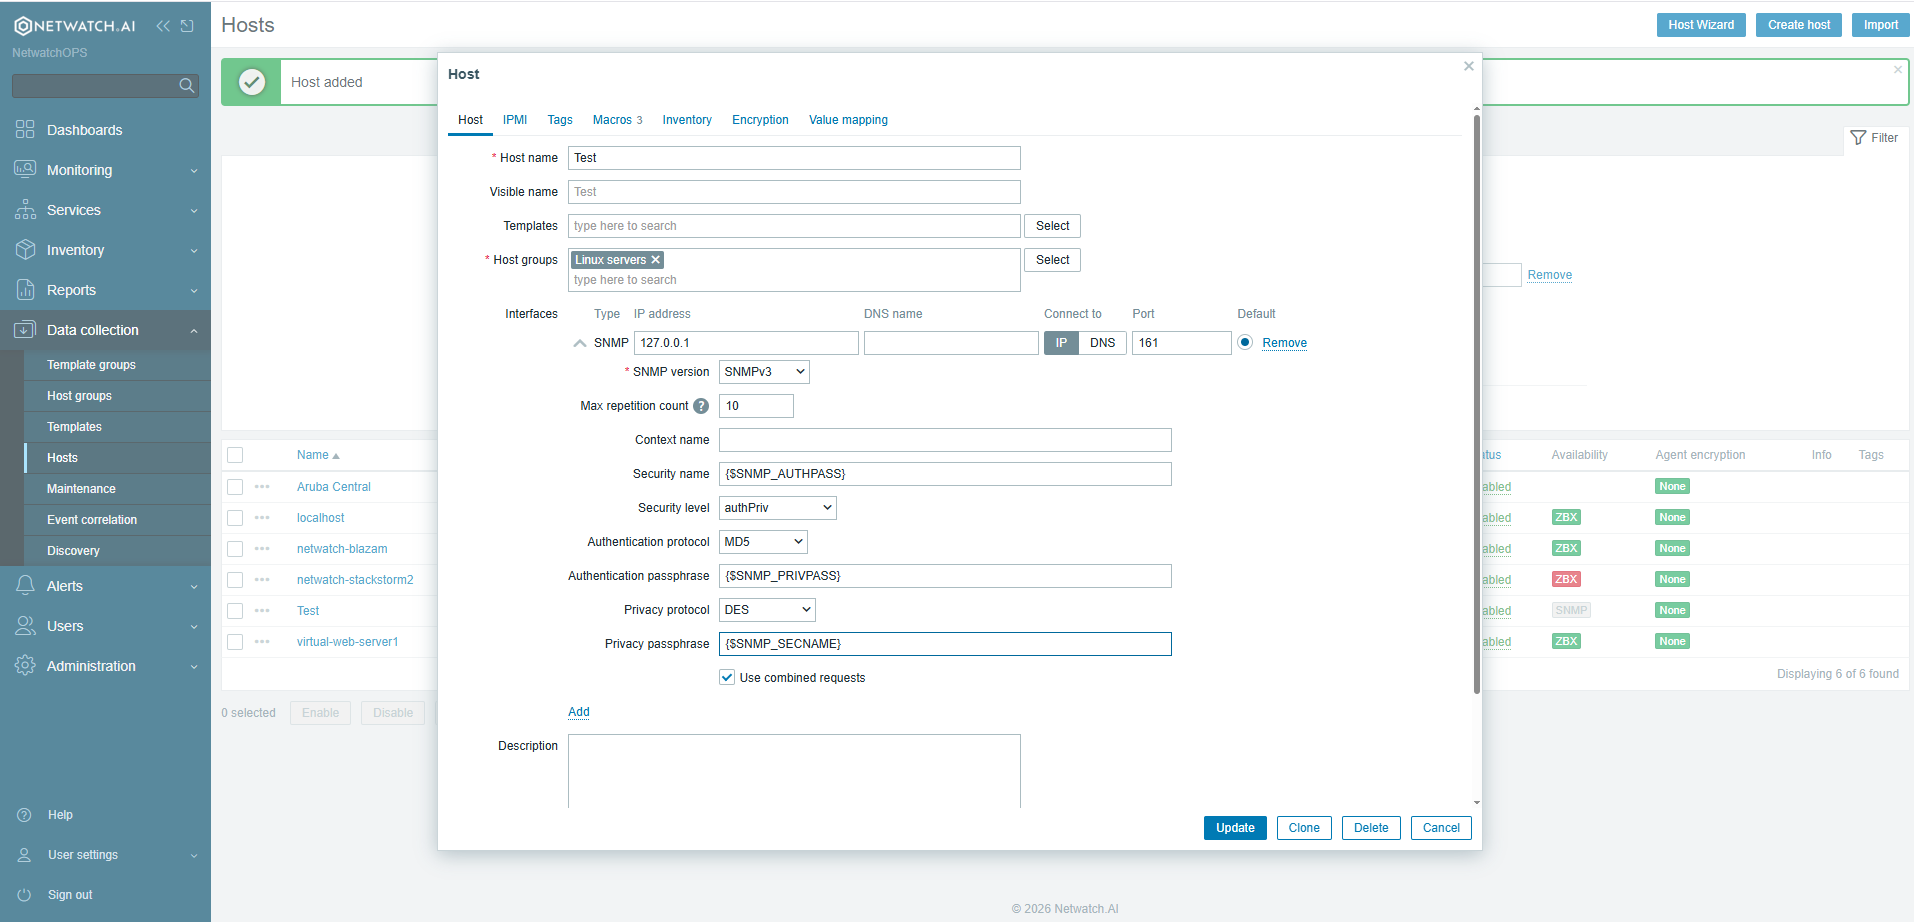
Now replace the hardcoded passphrases on the host's Host tab with the macro names.
-
Click back to the Host tab within the same host configuration.
-
Scroll down to the Interfaces section and locate the SNMP interface.
-
Update the following fields to use your macros:
Field Replace with Authentication passphrase {$SNMP_AUTHPASS}Privacy passphrase {$SNMP_PRIVPASS}Security name {$SNMP_SECNAME} -
Click Update to save.
The SNMPv3 fields will now display the macro names rather than the raw passphrases, and the underlying values remain masked in the frontend.
Troubleshooting
| Issue | Possible Cause | Resolution |
|---|---|---|
| Macro not resolving / items unsupported | Macro name typo in the interface field | Verify the macro name matches exactly, including {$ prefix and } suffix |
| Need to update a masked value | Cannot view existing value | Hover over the Value field and click Set new value — this clears and replaces the current secret |
| Macros not inherited on host | Template macro not defined at host level | Add the macro override directly on the host's Macros tab |
| SNMPv3 authentication fails after change | Wrong value entered when setting new secret | Re-enter the passphrase carefully; there is no way to retrieve the previous value once saved |