
Host discovery
Add a network for automatic host discovery in Netwatch.
Prerequisites
Before configuring network discovery, ensure the following:
- The Watchnode or Micro Node is deployed and communicating with Netwatch
- You have administrator access to the Netwatch web interface
- The target network range is accessible from the deployed node
- ICMP (ping) or relevant service ports are not blocked between the node and target devices
Step 1 – Log In to the Netwatch Interface
- Open a web browser and navigate to your Netwatch instance URL.
- Enter your administrator credentials.
- Click Sign In.
Step 2 – Navigate to Discovery Rules
-
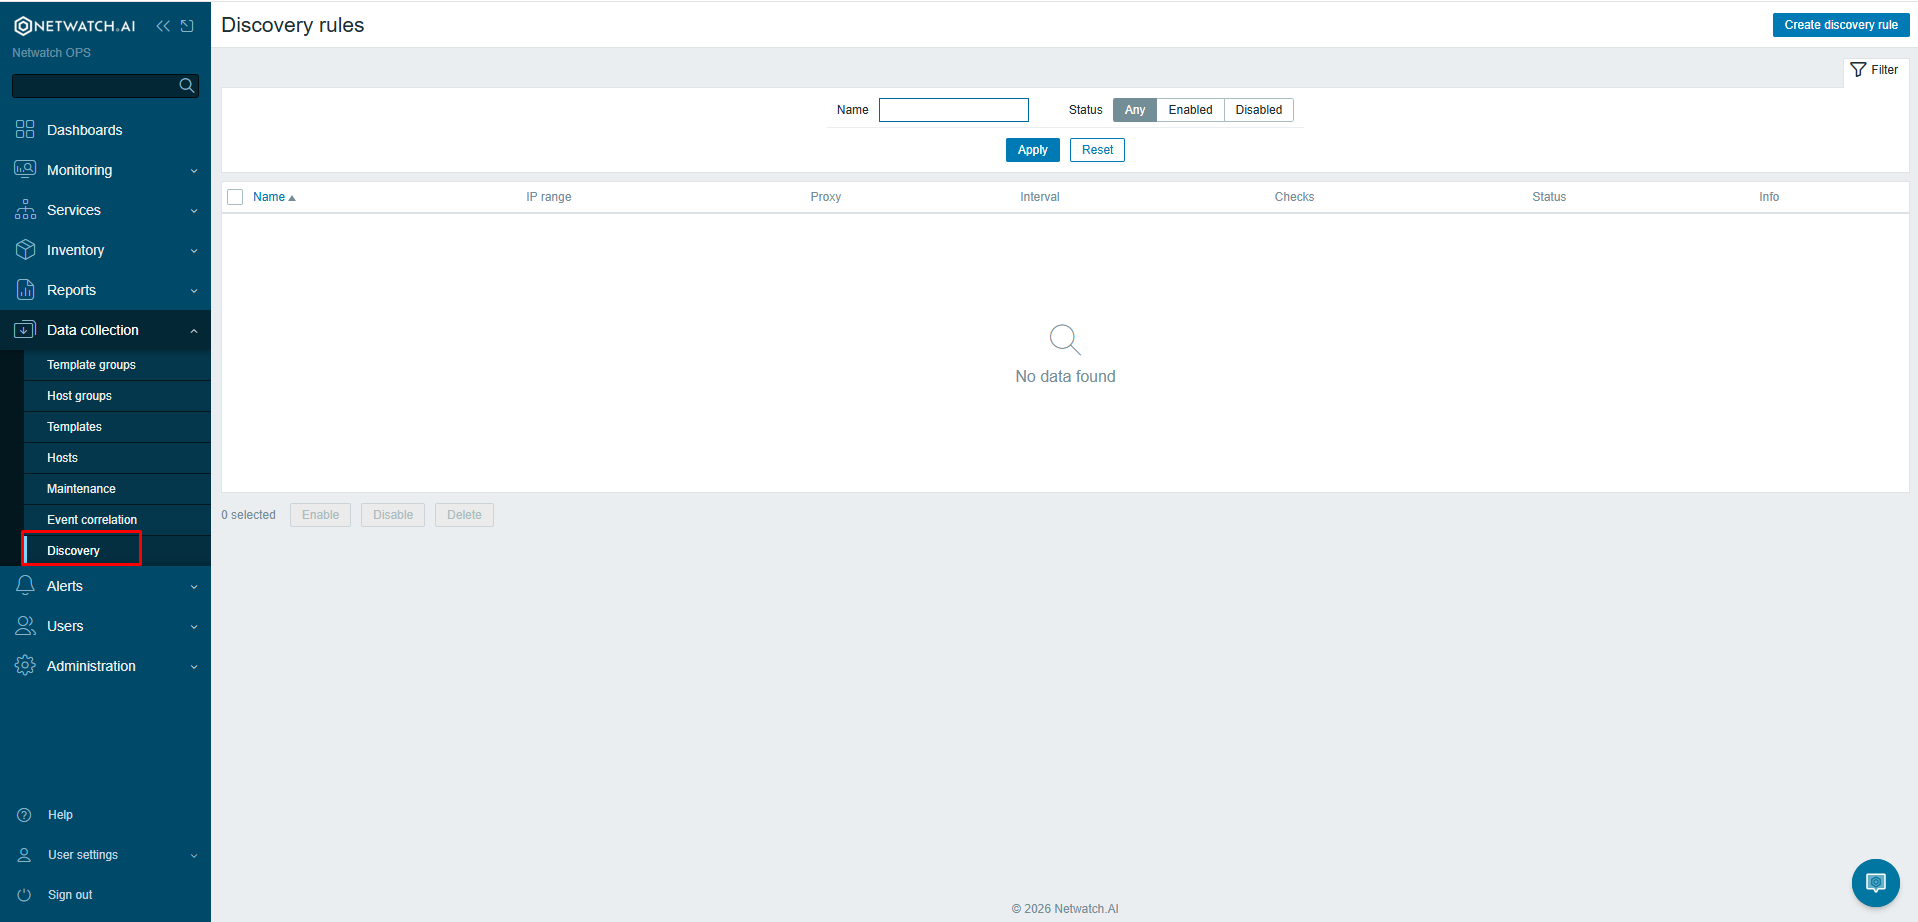
From the left-hand navigation menu, go to:
Data Collection → Discovery
-
You will see the Discovery Rules list (If any). This is where all configured network discovery jobs are managed.
Step 3 – Create a New Discovery Rule
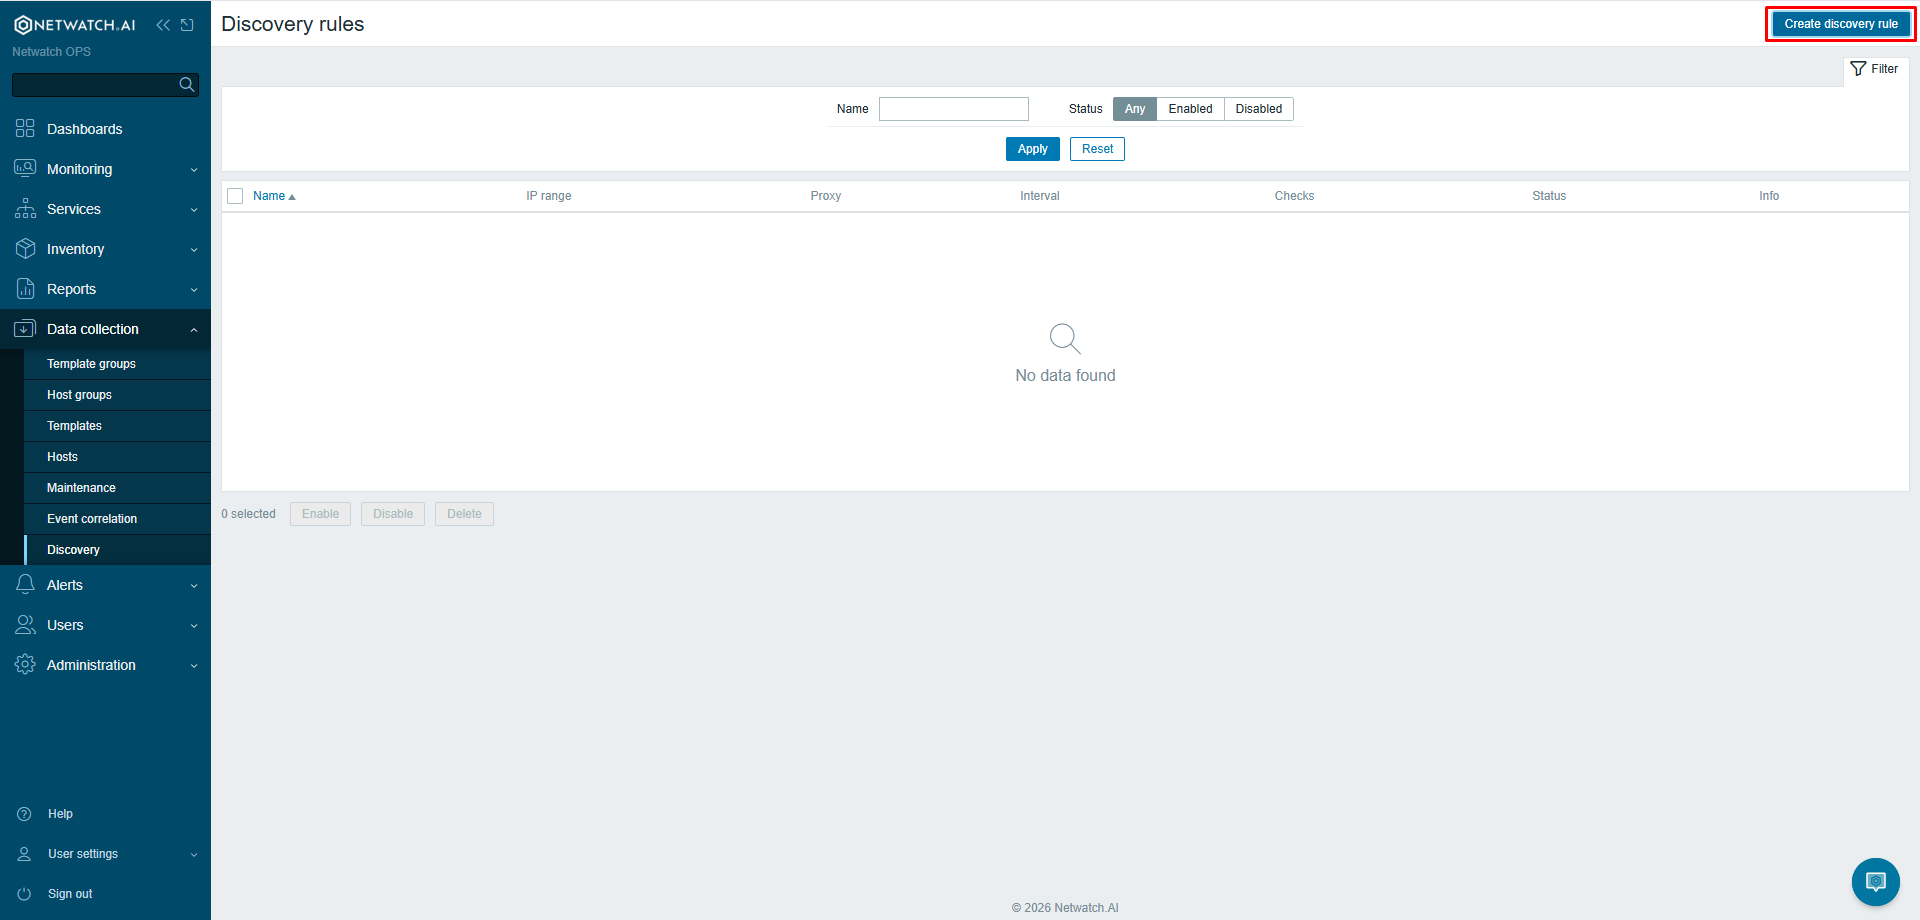
- Click Create discovery rule in the top-right corner.
- The discovery rule configuration form will open.
Step 4 – Configure the Discovery Rule
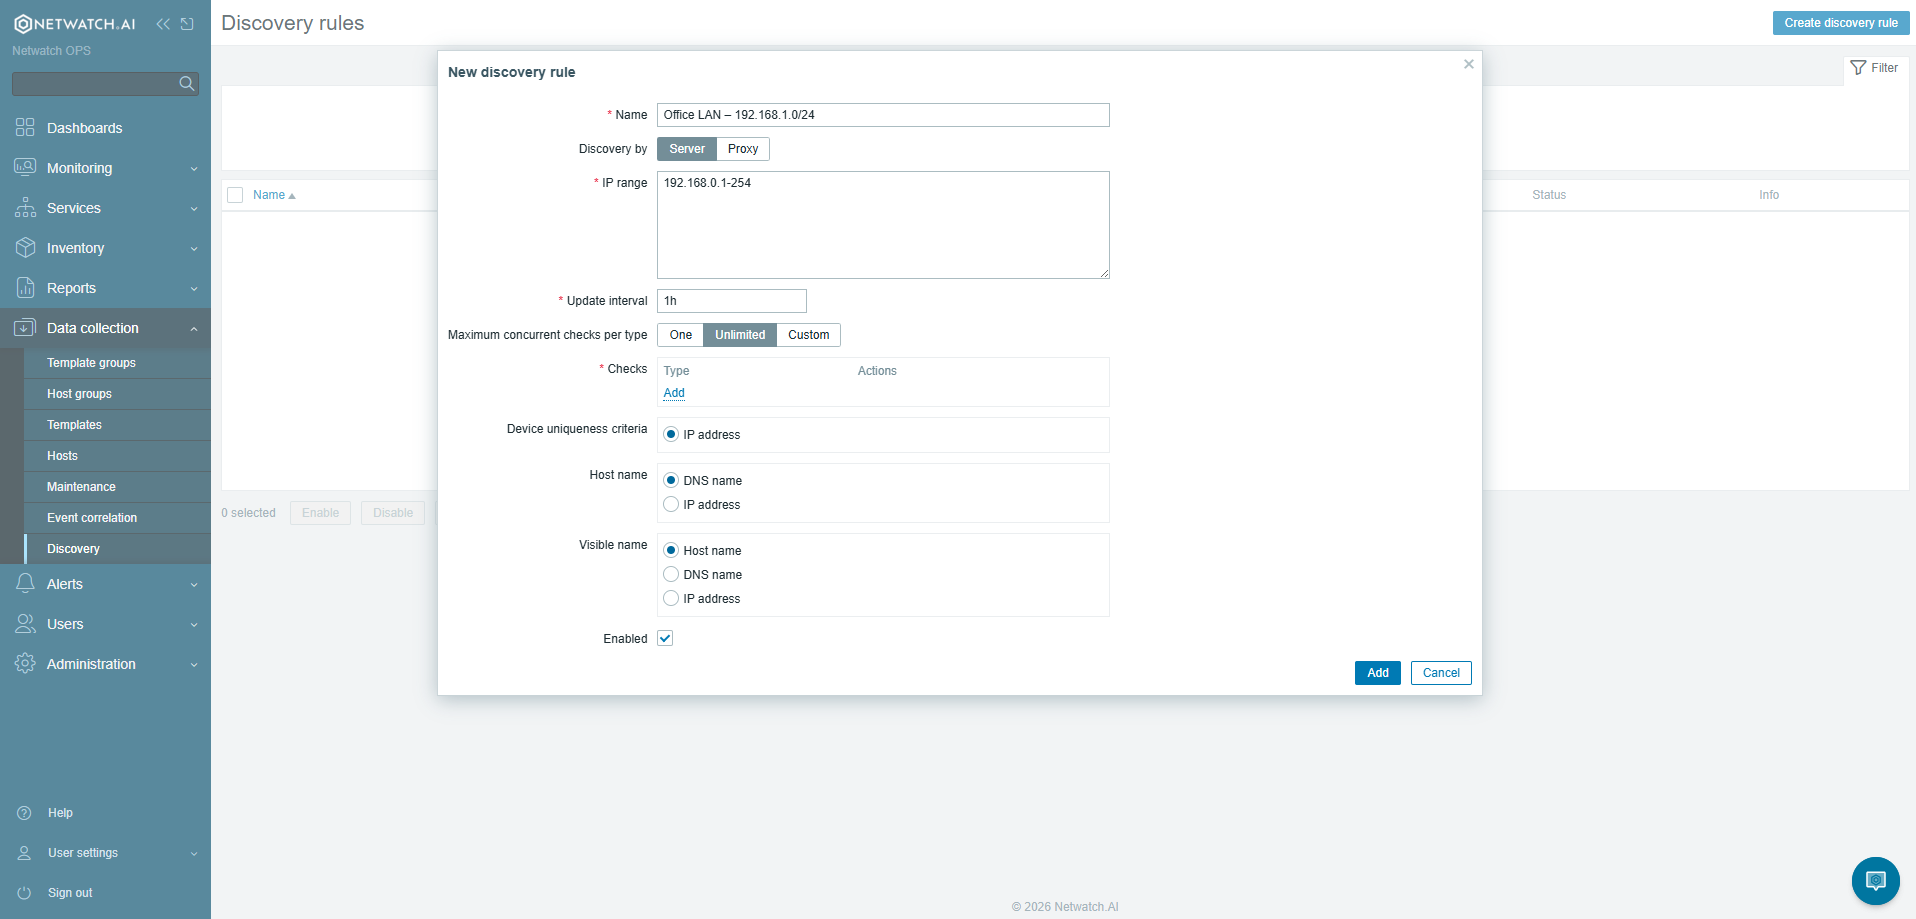
Fill in the following fields:
| Field | Description |
|---|---|
| Name | A descriptive name for this discovery rule (e.g., Office LAN – 192.168.1.0/24) |
| Discovery by proxy | Select the Watchnode or Micro Node responsible for scanning this network |
| IP range | Enter the target network range (e.g., 192.168.1.1-254 or 10.0.0.0/24) |
| Update interval | How frequently the discovery scan runs (e.g., 1h for hourly) |
| Checks | Define what checks to use for detection (see Step 5) |
| Device uniqueness criteria | Typically set to IP address for new deployments |
| Enabled | Ensure this is toggled on |
Step 5 – Add Discovery Checks
Discovery checks define how Netwatch identifies live hosts on the network.
-
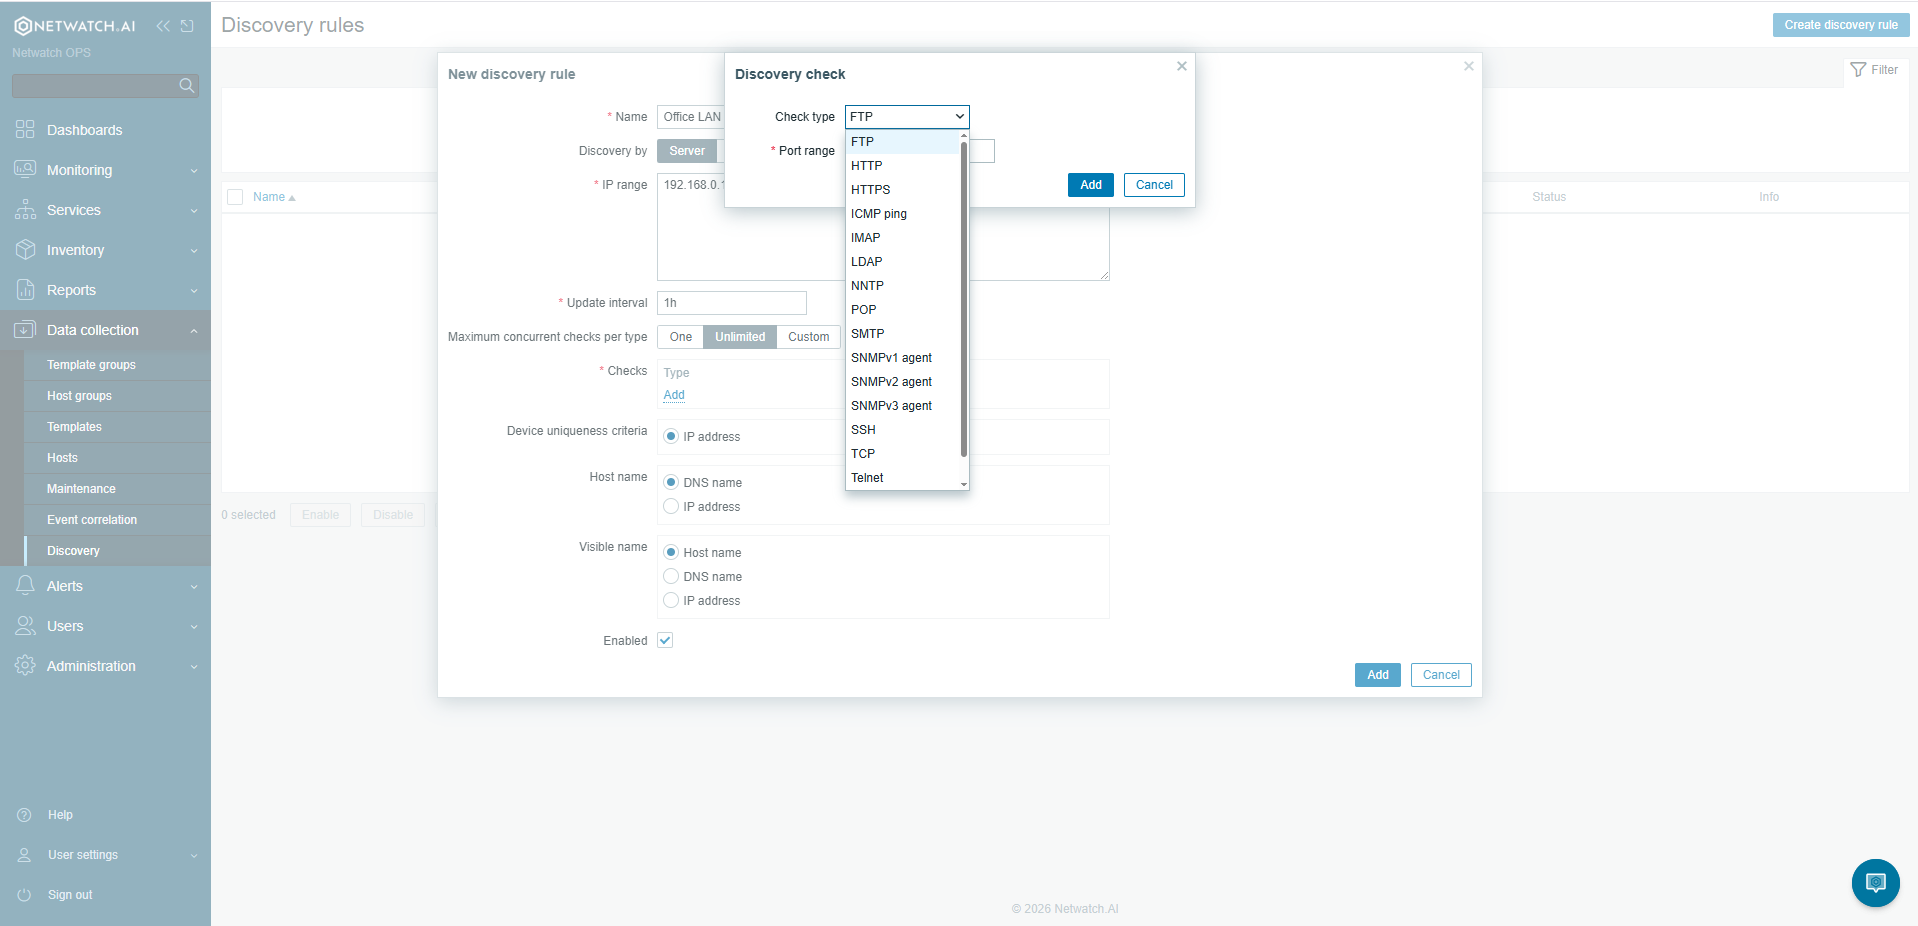
Under the Checks section, click Add.
-
Select a check type from the dropdown. Common options include:
- ICMP ping – Detects hosts that respond to ping (recommended as a baseline)
- Netwatch agent – Detects hosts running the Netwatch monitoring agent
- SNMP – Detects network devices responding to SNMP queries
- TCP port – Detects devices listening on a specific port (e.g., port 22 for SSH, port 80 for HTTP)
-
Configure the check parameters as required (e.g., SNMP community string, port number,ICMP Ping).
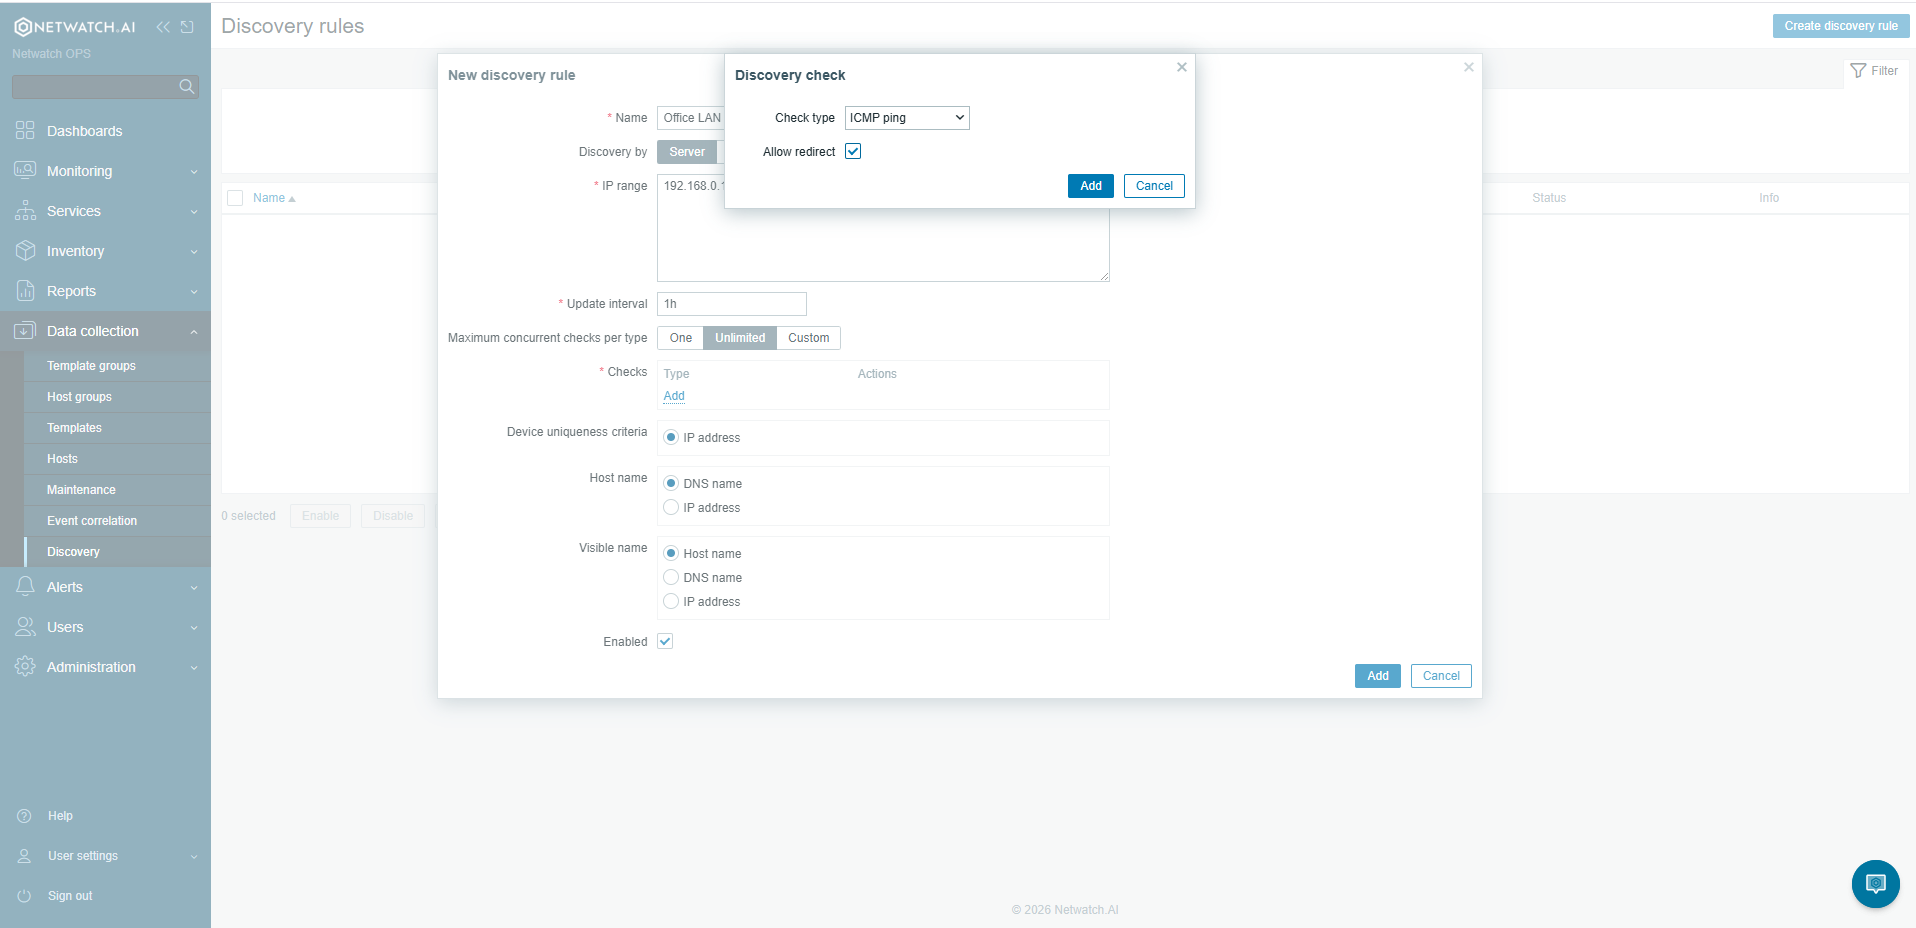
- Click Add to confirm the check.
- Repeat to add additional checks if needed.
Tip: Using ICMP ping alongside an agent or SNMP check increases the accuracy of discovery results.
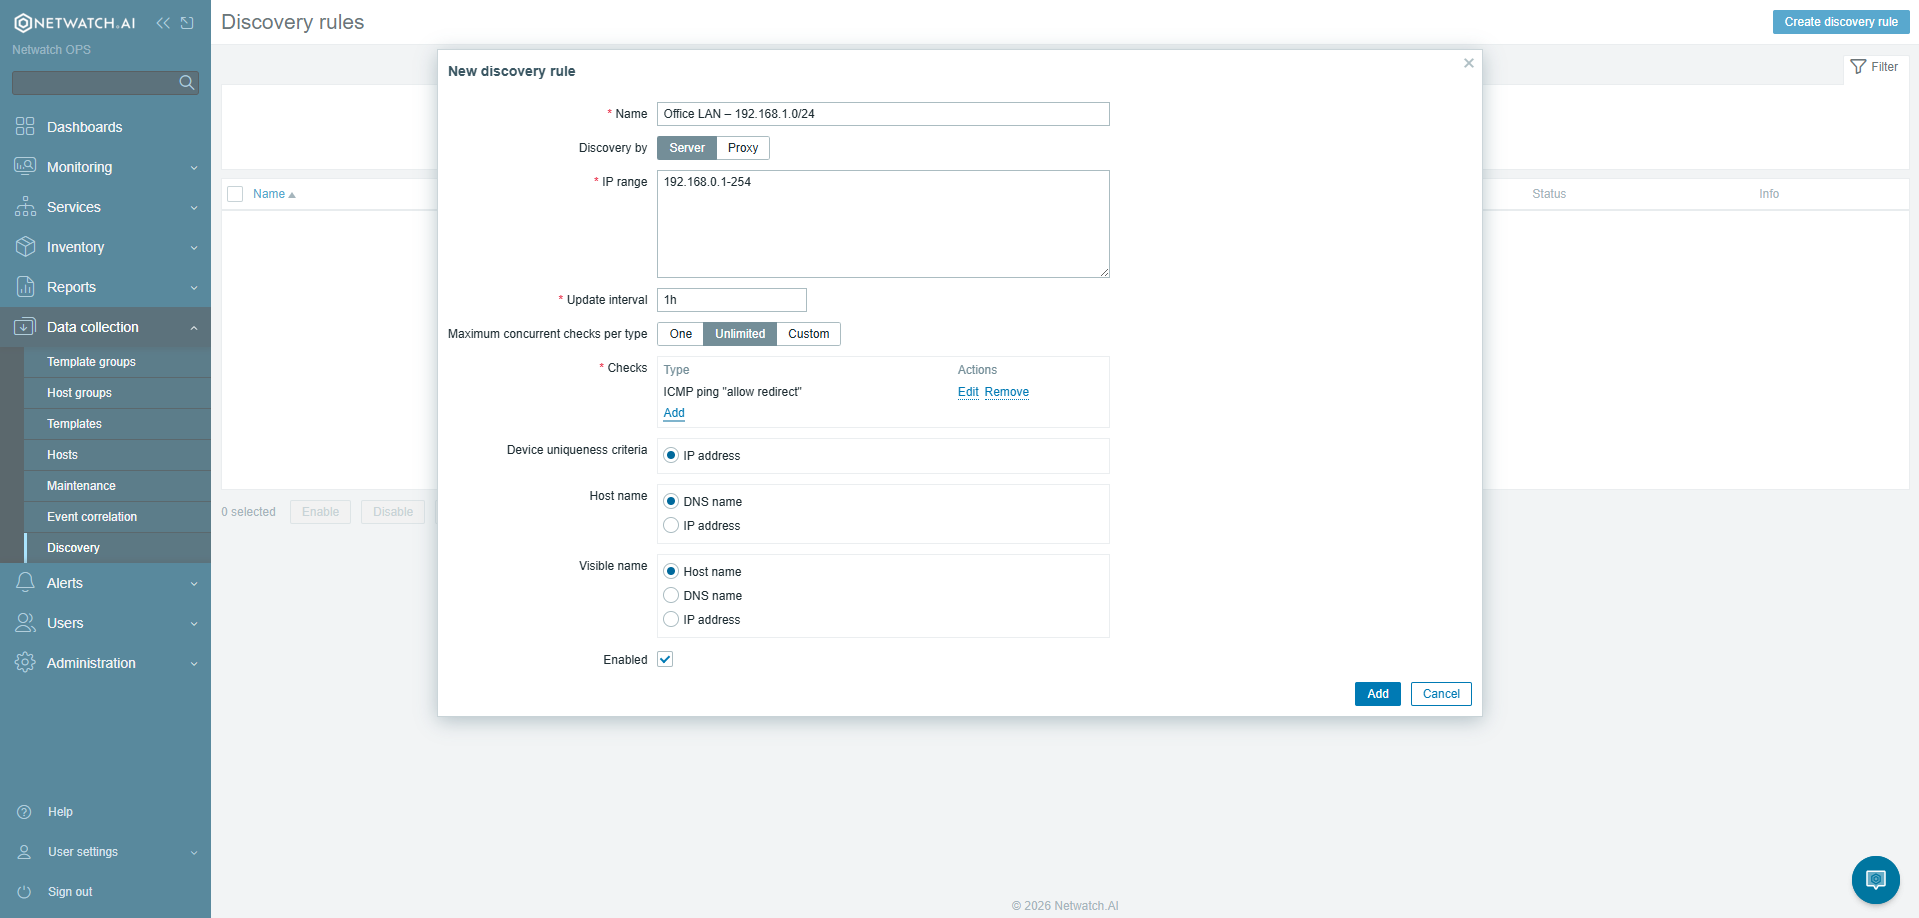
Step 6 – Configure Actions (Optional but Recommended)
Discovery Actions define what Netwatch does automatically when a new host is found.
-
From the left-hand menu, go to:
Data Collection → Actions → Discovery actions
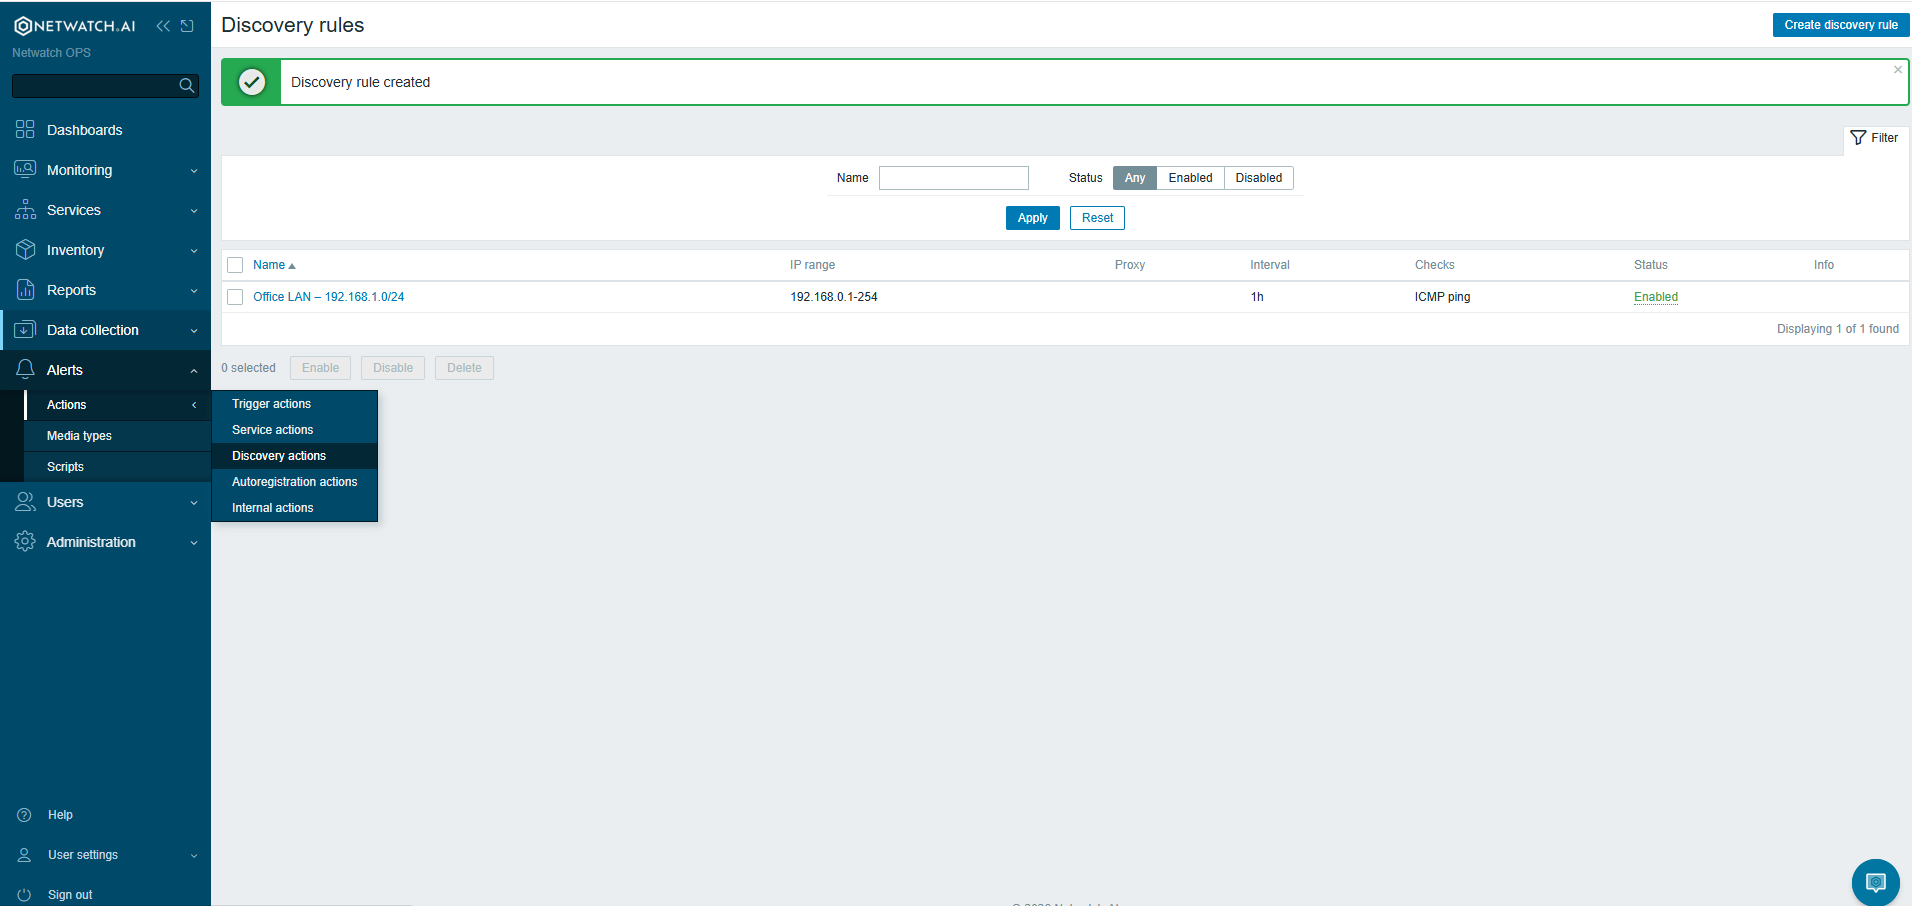
-
Click Create action.
-
Under the Conditions tab, set:
- Discovery rule = the rule you just created
- Discovery status =
Up
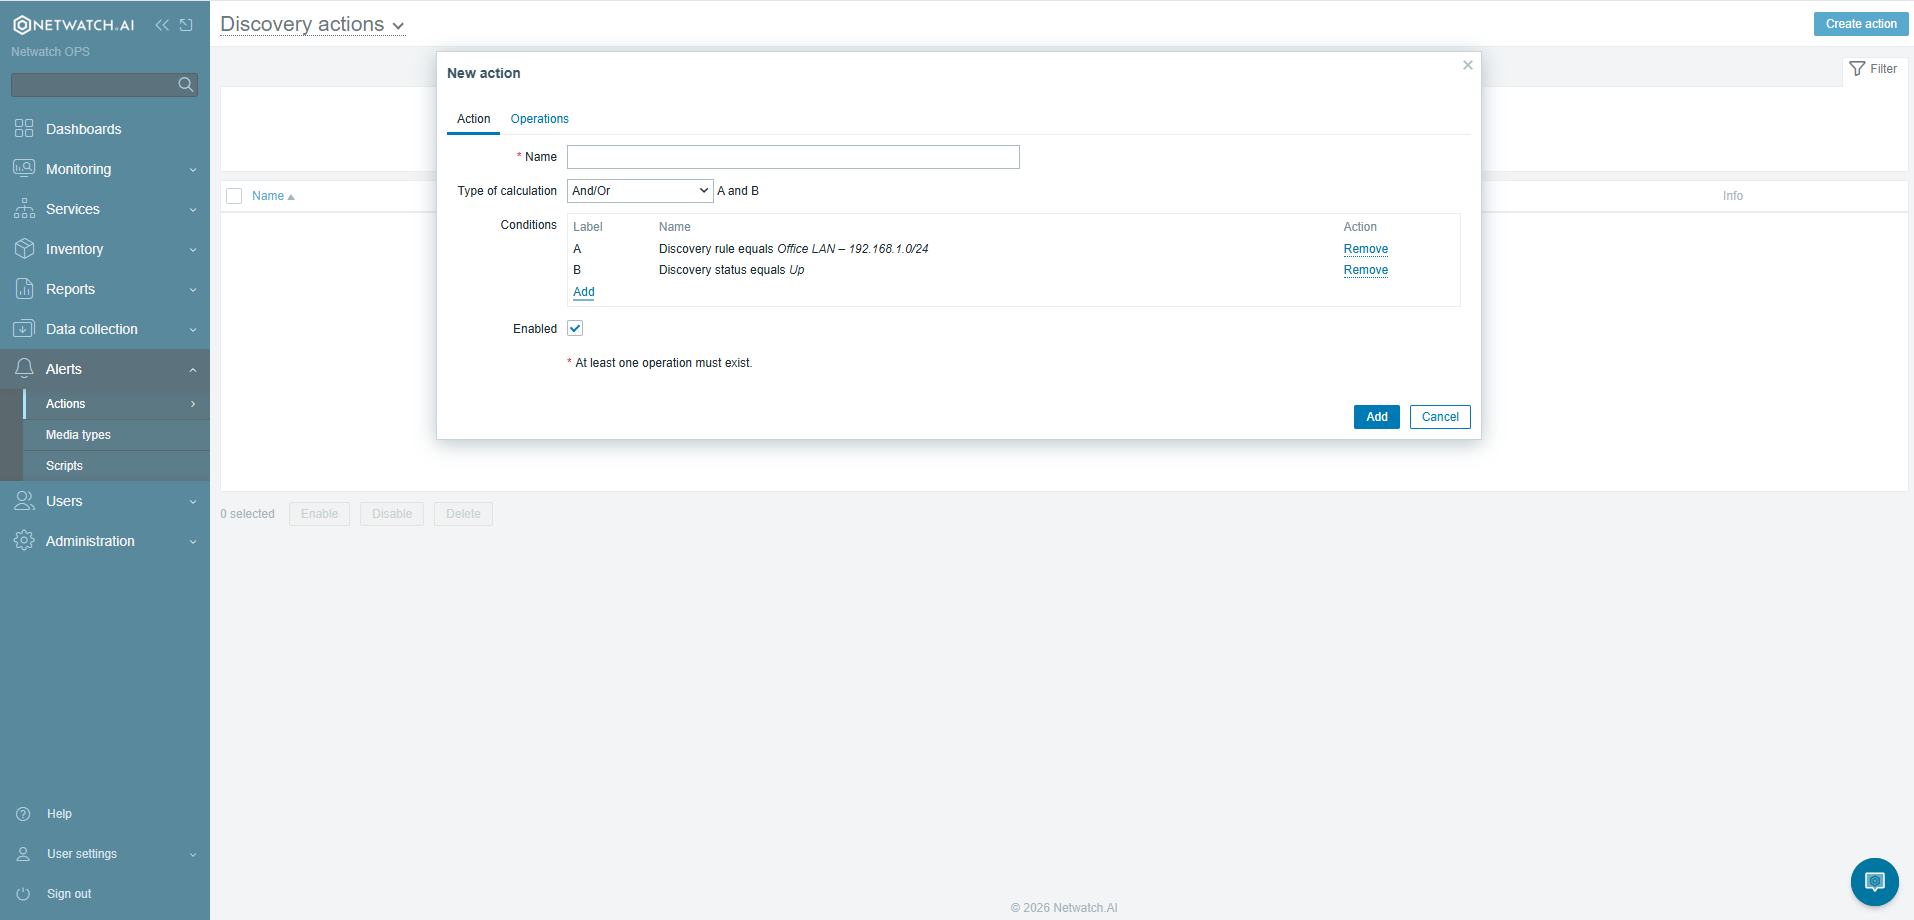
-
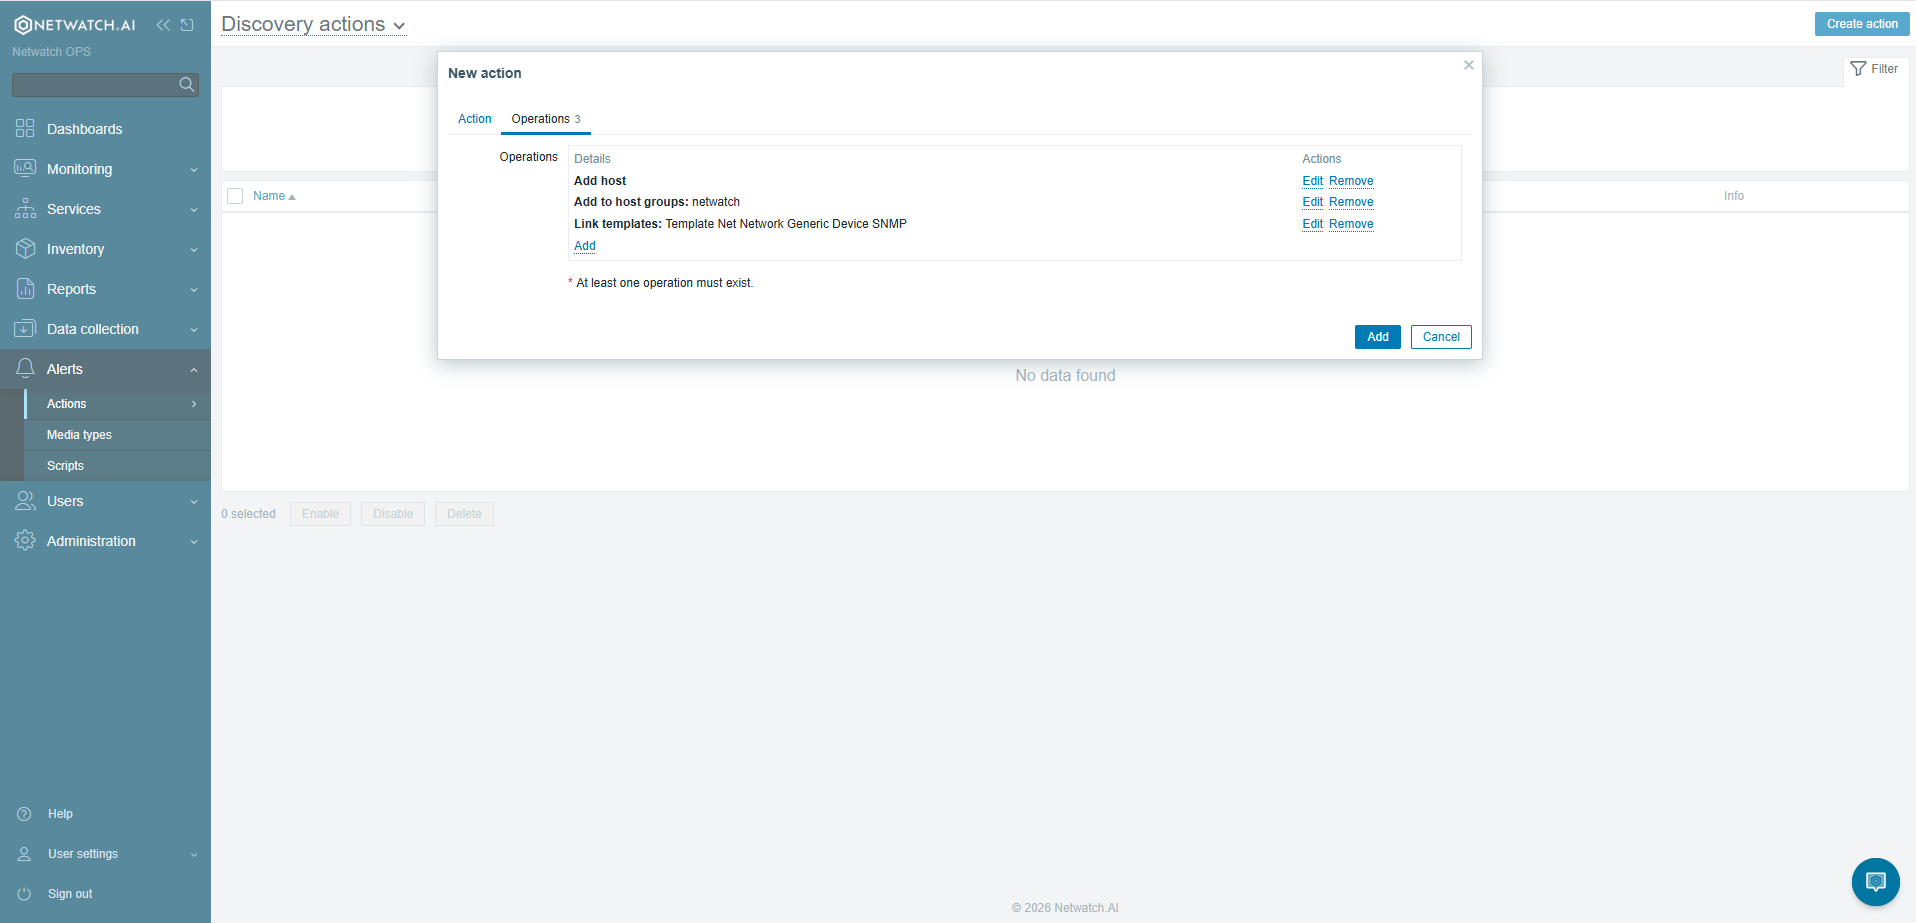
Under the Operations tab, add the desired operations, for example:
- Add host – Automatically registers the discovered device
- Add to host group – Assigns the device to a relevant group (e.g.,
Discovered Devices) - Link to template – Applies a monitoring template to the device automatically
-
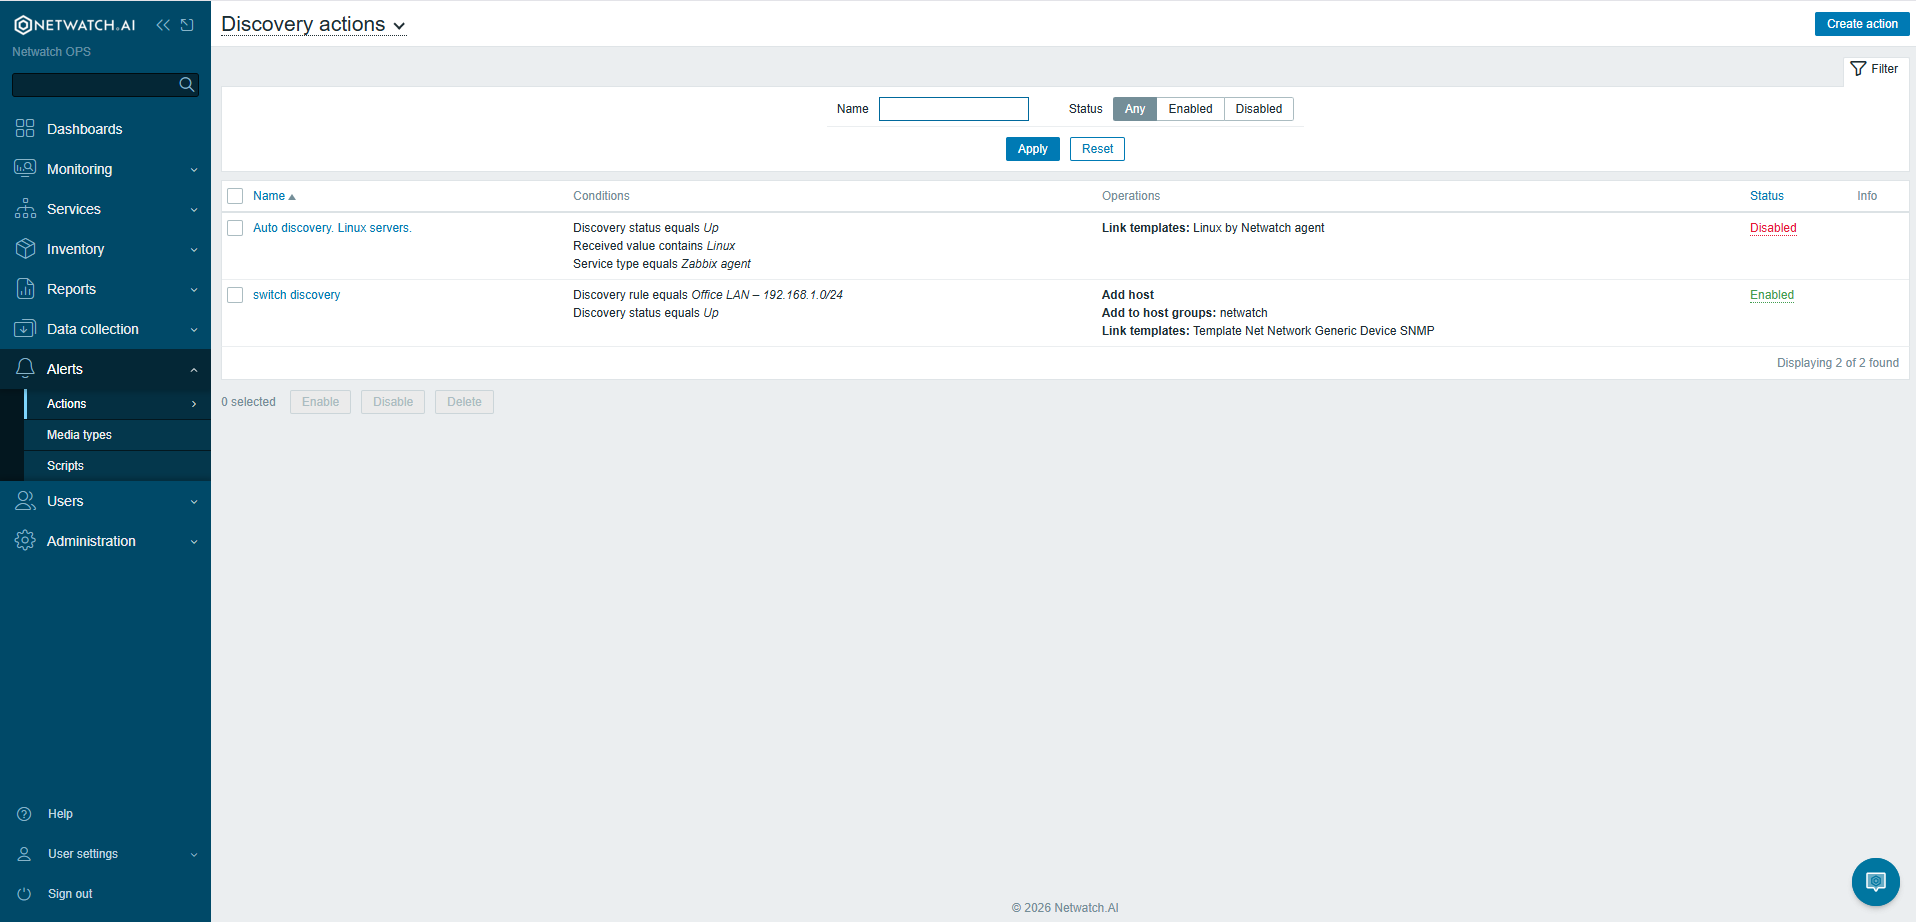
Click Add then Update to save the action.
Step 7 – Save the Discovery Rule
- Return to Data Collection → Discovery.
- Review all settings in the discovery rule form.
- Click Add (or Update if editing an existing rule) to save.
Step 8 – Verify Discovery is Running
- Navigate to Monitoring → Discovery.
- You should see the discovery rule listed with its status and last run time.
- Once the scan runs, discovered hosts will appear in the list with their IP addresses and detected services.
Note: The first discovery scan will run at the next scheduled interval based on the Update interval you configured. To trigger an immediate scan, temporarily reduce the interval, then restore it after confirming the scan has run.
Step 9 – Review Discovered Hosts
- Go to Monitoring → Discovery to view scan results.
- Confirmed hosts will also appear under Data Collection → Hosts if an Add host action was configured.
- Review each discovered host and assign appropriate templates or host groups as needed.
Troubleshooting
| Issue | Possible Cause | Resolution |
|---|---|---|
| No hosts discovered | ICMP blocked by firewall | Allow ICMP from the Watchnode IP to the target range |
| Discovery rule not running | Node offline or not selected | Verify node status under Administration → Proxies |
| Hosts discovered but not added | No discovery action configured | Create a discovery action (see Step 6) |
| Wrong node scanning the range | Incorrect proxy selected | Edit the discovery rule and select the correct node |